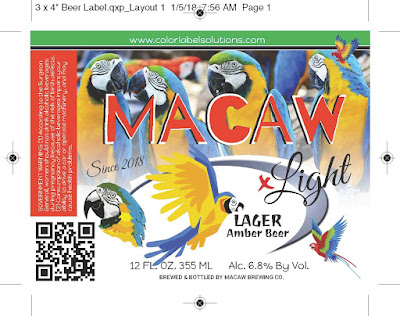
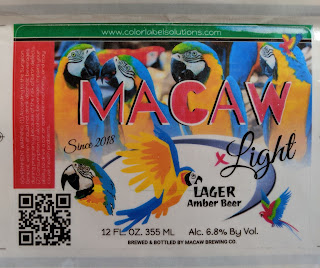
Printing full-bleed labels can be difficult; especially with a newly launched printer. The QL-300 is the first LED/Laser printer designed specifically for desktop label printing. It is capable of printing full bleed labels by following some easy steps.
 |
| QL-300 |
I’ve written about the QL-300 in the past. This article features the key benefits of the QL-300, printing foils and other interesting label media; and printing using white.
And this post covering designing with white:
The most important aspect for full-bleed label printing, even with the QL-300, starts with the artwork. You need to create artwork slightly larger than the actual label. Generally, we recommend using artwork that is .03” larger than the actual label. For example, use a 3.03” x 4.03” artwork for a 3” x 4” label.
 |
| Full-Bleed Label Artwork |
With this type of design as a PDF, you can print at the actual size in Adobe Reader.
 |
| QL-300 Full-Bleed PDF Printing |
Starting with the correct artwork makes full-bleed label printing easier to do.
With the QL-300, three other aspects are important for full-bleed printing; two are different and one is similar to other printers. First, the QL-300 requires the matrix left-on the labels. Label matrix is the waste material that is typically pulled off from die-cut labels. Here is the matrix surrounding the label.
| Matrix-On Label |
And the label partially removed to show just the remaining matrix:
| Label Removed To Show Matrix |
Matrix On is required because the toner on the liner does not get fused and may eventually cause problems in the fuser. Matrix On allows for overprinting and keeps the fuser clean.
I’ve written about leaving the matrix on in the past.
Second, the QL-300 requires an extra or larger gap between and around labels. Most die cut labels have a .125” gap between labels with a .0625” exposed liner on both sides. With the QL-300, the gap needs to be .375” and approximately .1875” on both sides of the label. You can see this extra space/matrix in the above picture. This extra space ensures the toner does not get into the paper path, reducing print quality and potentially damaging the fuser/printer.
Third, the .125” blackmark needs to be placed halfway between the labels; basically starting .125” after the previous label and ending .125” before the next label. You can see the blackmark easily with this clear label
 |
| Blackmark Through Clear Film Label |
With the correctly designed artwork, matrix on and the larger gaps, you can print beautiful full bleed labels with the QL-300.
 |
| Full-Bleed Printed Using Clear Film Label |
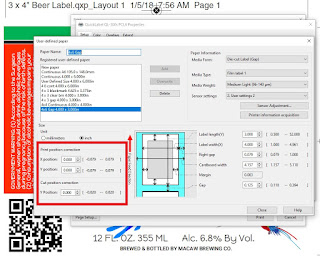
After printing, you may need to move the image around the template for perfect placement on the label. For full-bleed printing, expect you’ll need to adjust the “paper print adjustment” to move image on the label. With the QL-300 driver, it’s easy to adjust the position of the printed image:
And changes in the position adjustment direction show up in the label image to the right; which is a very helpful feature.
I’ve written about adjusting the printed image on the template for theL801 in the past.
With the matrix on, you may need to remove it prior to any automatic label application. Applicators will not work with the matrix on. To remove the matrix, the QL-300 has an accessory to pull this waste material off the liner.
 |
| QL-300 Matrix Remover |
This matrix remover works similar to the accessory featured in this earlier post.
The QL-300 produces beautiful labels on a large variety of materials; and can print white. It’s a very unique label printer and maybe perfect for your operation. Following these technics, you can print full-bleed, producing great-looking labels. Contact us if you have questions about the QL-300.
Purchase the QL-300 here.
Guy Mikel
855-962-7670

