Streaks No More

Streaks or Streaking is the “bane of the existence” of an operator of an inkjet label printer.
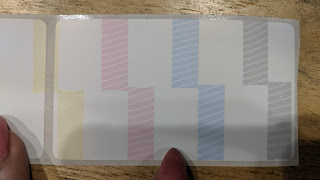
Streaks From QL-120
Streaks From QL-120 Label Printer
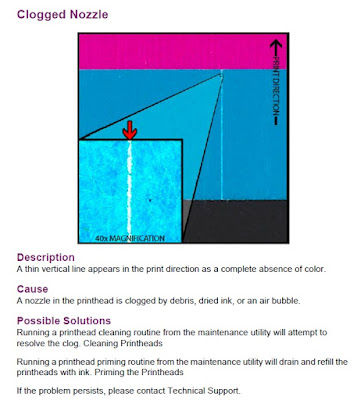
Typically, vertical streaks occur when a printhead nozzles get clogged and stop working, but can also be caused by head alignment and paper feed issues. To eliminate the streaks, Quick Label recommends cleaning and/or replacing the printhead of Kiaro or QL-120 printers.


QL-120 Clogged Nozzles
QL-120 Non Functioning Nozzles


QL-120 Clogged Nozzles

However, replacing a Kiaro or QL-120 printhead may get expensive.  $699 per channel and up to $2,796 to replace all four.

And in my personal experience, this still may not completely remove the streaks, especially when printing artwork that is 100% covered with ink, due to paper feed and head alignment issues mentioned earlier.


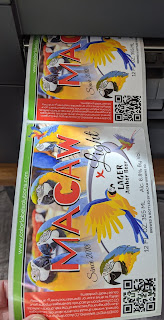
QL-120 Print Output With Streaks
Instead of attempting to cure streaking issues, another option is to design a label printer that can correct or eliminate streaking automatically.  This idea is what Epson has seemingly done with the C6000 label printer series.

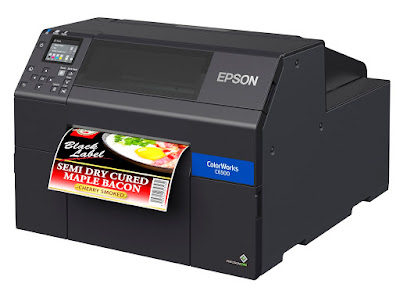
C6500 Color Label Printer
I got this idea by watching the printhead of the C6500 move/work.  By comparing the print speed settings, you can see a difference in number of passes/overlap and print resolution.  Watch the difference between Max Speed, Speed, Normal, Quality and Max Quality setting of the C6500 print two, 4” x 6” labels.


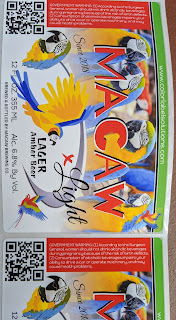
And not a streak in sight on these labels.

C6500 Labels With No Streaks
To confirm my ideas, I contacted Andy Scherz, Product Manager Epson to learn more about the overlap capability of the C6500 printer.

According to Andy, “Epson has a lot of experience making printers that don’t streak; especially the high-resolution photo printers.  The best way for me to explain how the C6500 works is to compare to other printers.”
Continuing, Andy says, “the C3500 prints basically 1″ at a time” by moving the printhead left to right, then another inch followed by right to left.  At the intersection between this printing, a banding effect may occur if the ink spray doesn’t overlap exactly correct.  In the C3500 driver, you can adjust for this banding effect; but it takes time. Since the C3500 was introduced, the Epson driver/firmware was updated to add a “Quality Mode 2” setting that makes 2 ¼ passes on average which greatly improves print quality.”  After selling and installing 1,000+ of the C3500 printers, the effect of this setting was news to me. Everyone with a C3500 should consider changing/testing the Mode 2 settings!
“Comparing the C7500” says Andy, “Epson uses the new Precision Core technology that produces precise dots/pixels of color.  These precise dots produce better image quality than other types of older, inkjet printers.  Using an analogy, it’s like shooting a rifle compared to shotgun; a very precise dot with the Precision Core based printers.”
Even with this new technology, the C7500 may leave “print artifacts”. First, an inkjet nozzle may get plugged and leave a vertical streak.  The C7500 uses a “waterfall” type of printhead, which means the printhead does not move.  If a nozzle gets plugged, the C7500 can find the plugged nozzle and attempt to compensate to correct the print (dot substitution).  I understand it takes more than one plugged nozzle to notice streaking in the C7500.  An operator can attempt to unplug the nozzle first by using the Cleaning function, then try to remove air in the ink lines from the Maintenance menu from the front LED screen.
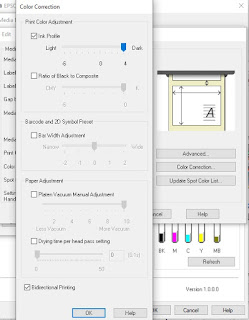
Second, as the C7500 prints so fast, localized wind as the media moves through the printer may create print artifacts.  I’ve found by moving the Color Mode Ink Profile to “Dark” improves this issue significantly.

C7500 Ink Profile Setting
Comparing the C7500 to other printers, Andy says, “printheads in other label printers are not as durable as the Precision Core. Therefore, they need to be replaced frequently; and as they fail, the number of streaks increase.  Further, the pixels look more like a “splat” up close rather than a precise dot with Precision Core.”
The C6500 has both similarities and differences to the C3500 and the C7500 printer.  First the C6500 uses the new Precision core technology like the C7500 producing very fine print resolution.  Second, the printer overlaps when printing, but potentially much better than the C3500.
In my discussions with Andy, I learned the following about the C6500:

  •  The media is stopped during printing eliminating wind effects.
  •  The C6500 then uses special overlap patterns of head and paper feeding to eliminate streaking. 
  • In Normal mode, average overlap is 2.5 passes.  In Max Quality mode, the average overlap is 12 passes.  This overlap means that when a nozzle is plugged, other nozzles can easily compensate for the issue.  Further, the multi-pass patterns averages out any feed or alignment imperfections virtually eliminating streaking. 
  • In Speed and Max Speed, the C6500 does not overlap.  By combining the more precise dots from the Precision Core printhead with shifting the C,M,Y colors darker in the Color Correction dialog box.


C6500 Color Correction For Max Speed

Better print quality can be produced using these lower resolution/faster print speed settings.
Bottom = “Normal”; Top = “Max Speed”
Bottom “Normal” setting (About 2”/Second) with no banding; Top “Max Speed” setting with Max Color setting (about 5”/Second).

In the top, I can see slight banding.  In an attempt to improve this setting, I made a banding adjustment in the printer setting utility, including printing an adjustment sheet.

C6500 Banding Adjustment
And I did improve the banding with the adjustment.  One interesting point: I found Max Speed seemed to produce less banding than the Speed setting.
Andy says, “Normal setting will be sufficient for most organizations.  But by adjusting Max Speed, Color Correction and Banding, higher speeds can be obtained with sufficient print quality for most labels.”
With the printing overlap, operators will find the C6000 series printers easier and less costly to run; Less to no streaking and no need to replace printheads as with Kairo, QL-120, LX2000, LX900, VP485, VP495 and the 300x label printers.  And if you need faster speeds, setting changes available in the C6500 make the printer run much faster.
If you are tired of dealing with streaks in your label printing, contact us.  We’ll help make your operator’s life much better.
Guy Mikel
855-962-7670

Printing Circles With The C6000

Printing Circles correctly can be difficult.  But one, mostly overlooked, feature of the new C6000 series of label printers from Epson is the movable gap sensor.

C6000 Movable Gap Sensor
Epson did not mention this feature in their C6000 series press release:

Epson does not mention this capability on the main C6000 product webpage:

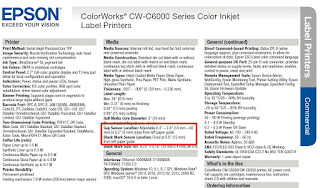
Epson doesn’t mention this feature until the 4th page in small type in the collateral material:

C6000 Movable Gap Sensor
C6000 Movable Gap Sensor Copy
But the movable gap sensor may be the most used and important feature on the C6000; especially if you print circle labels.  Now you don’t need blackmarks on labels to print circle labels correctly.


C6500P Printed Circle Labels

This post is designed to help you start printing circle labels correctly using the new C6000 series printers by moving the gap sensor.
Most importantly, TURN OFF the printer to move the gap sensors.  And make sure the TOP/BOTTOM sensors are aligned.

C6000 Aligned Gap Sensors
The first time I tried to use the movable gap sensor feature, I failed on following both of these requirements. It took forever to figure it out; including having to read the instructions.  Find them on page 166 of the Engineering manual.

C6500 Label Detector Instructions

If you don’t align the sensors correctly, you get this error on the printer:

C6000 Gap Sensor Error

And in fact, I thought I had the sensors aligned correctly; but kept getting an error.  It seems sometimes the printer had issues with the movement of the gap sensors once the printer was turned back on.  I just turned it off again and adjusted the sensors to get it to work correctly.
On circles, the idea is to move the gap sensors to align with the apex of the leading edge of the circle.  To make this change, I would follow these steps:
  • Use the LED menu on the printer to adjust the media settings to the new label (I recommend using the LED menu on this printer and not the driver).
    • Media Type: Matte Paper, etc.
    • Media Detect: Gap or Blackmark
    • Media Source: Internal or Rear Feed
    • Media Form: Roll or Fanfold
  • Turn off the printer
  • Load the new label media to set the widths of the guides; then remove
  • Move the gap sensors to the center of the new label media.
  • Turn on printer. 
  • Load label media


C6500 Gap Sensor Set Correctly

To print circles, especially multiple up circles, I recommend using BarTender.  This label creation and printing software makes circle label printing much easier to do than with static PDF’s or other file types.  With BarTender, I can adjust easily the settings for printing circles; such as rows/columns of labels and gap between:
BarTender Circle Settings
In addition, you can embed the image in the background and easily add an “overhang” to the print, which makes printing full-bleed much easier to do.

BarTender Background Image Overhang
 Using this feature in BarTender, I recommend you set the template as the same size as the actual label.


BarTender Label and Template Size
With BarTender and the movable gap sensor, I printed 1” 2 Up circle label above earlier in the post, and 2” circle labels:

2
2″ Circle Labels 
And 1” clear film circles 6 UP using the blackmark sensor:

1
1″ Clear Film  Circle 6 UP Labels
(FYI: the minimum 1″ print width feature of the C6000 series eliminates the need to print small sizes multiple up!)

During an attempt to print circle labels with a blackmark directly between (Kiaro and QL-120 require this blackmark location), I learned the gap sensor would not function.  The blackmark affected the reading of the gap.  By changing to the blackmark sensing, I could print 3” circles as well.

3
3″ Circle Label Using Blackmark

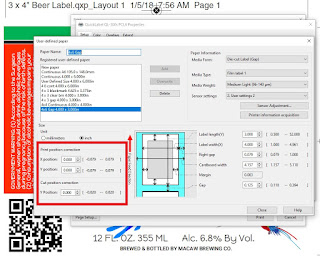
All of the different sizes and especially the blackmark in the middle of the gap required me to change the print start position; both vertically and horizontally.  To change the print start position, go into the printer setting utility and select the vertical or horizontal setting.

C6500 Vertical Start Position

Please know; the C6000 series offers a great deal of mobility in terms of the movement of the vertical print start position.  For example, more than a .25” with the label with the blackmark directly between the labels.  However, the C6000 series is limited to .06” horizontal movement; which sometimes is not sufficient to print full bleed.  If the horizontal movement is insufficient for full bleed, try reloading the labels or adjusting the artwork to achieve full-bleed on both sides.
Printing circles correctly can be difficult and frustrating; trust me I know.  But the movable gap sensor on the C6000 printer makes printing these labels much easier to do.  Purchase the C6000 Series Label Printers here.

Or contact us to discuss how the C6000 series printers can make your work life easier.
Guy Mikel
855-962-7670

info@colorlabelsolutions.com 

PAC5 Color Label Printer Applicator

I am pleased to announce the PAC5, color label printer applicator from General Data Automation.

PCT5 Color Printer/Applicator

The PAC5 is the first table top color print and apply machine designed to make label printing and applying easier and simpler to do.    After sending a job to the printer and placing a package under tamp head, the PAC5 triggers the start of the application process.  The PAC5 prints, feeds a label on to the pad and extends the dual tamps to apply the label.  Once the label is applied, the PAC5 retracts the tamps allowing the operator to remove the package and repeat the cycle.

PCT5 Color Printer/Applicator
PCT5 Color Printer/Applicator In Action
The PAC5 was created by John Roberts, Vice President of General Data Automation.  According to John, “we started with a flat package applicator but will adding a round package applicator in the future.  With the flat package applicator, we can provide a jig to hold the package in place to ensure the label is placed in the same place every time. And for many potential customers, the benefit of applying labels in the same place every time is a crucial aspect of the packaging esthetics.”
The PAC5 has two different operation modes; Batch and On-Demand.  In the Batch mode, the operator sends a print job to the printer.  The printer prints and presents a label placing it on the tamp pad.  As the operator moves a flat package underneath the tamp, a sensor triggers the applicator to apply the label.  John says, “the sensor speeds up the label application, initiating the process.  No need to press a foot pedal or pull a lever.  In Batch mode, the operator doesn’t have to wait for the printer to produce the label.”
Batch Mode is designed where an operator wants to print a series of identical labels; where lot numbers, production dates, best-buy dates, etc. don’t change.  Further, the PAC5 in batch mode eliminates the need to rewind the printed labels, saving significant time and money.  For most customers, I believe, PAC5 will be used in Batch mode.

Color Printed Label With Variable Data

On-Demand mode is designed for situations where the operator must keep a 1:1 relationship with the label and package.  John says, “for those situations where labels must be serialized/sequentially numbered, the On-Demand mode works the best.  In this mode, the printer produces and presents the label after the package is placed underneath the tamp.  This way the operator can ensure the correct label is placed on the package, with the correct date, numbers, etc.”.

Watch the PAC5 in On-Demand mode operate here:


The PAC5 uses the C6000 series label printers.  One feature of these printers makes the PAC5 possible; peel and present.  Learn more about these printers here:


The PAC5 comes standard with many features that are upgrades from other machine builders; including a 5 color status indicator,  On / Off Switch, Jog Button, Lock Out /Tag Out Main Disconnect, Adjustable Level Feet, and Out of Media Detection.

If desired, we can support the deployment of the PAC5 with jig creation, on-site training, return to depot service, label creation software (BarTender, Nicelabel, etc.) and of course labels.  Our goal is to make the PAC5 improve your overall operation.
If you believe the PAC5 would improve your operations, contact us to discuss your requirements.  Plan on sending us packaging and label sizes/material to test to ensure the printer/applicator works for you.
It’s great selling unique, new products that fit our on-demand color label market.  Contact us to learn more about the PAC5 and printing color labels on-demand.
Guy Mikel
855-962-7670

Smart Touch Panel-C6000P

At the recent WestPack 2020, John Roberts of General Data Automation showed in our booth the Smart Touch Panel running the C6000P.

Smart Touch Panel/C6000P
John Roberts with the Smart Touch Panel/C6000P
General Data is the new parent of Color Label Solutions; learn more here. 

And John leads our automation group, which designs and deploys label application and other automation equipment; and is the developer of the Smart Touch Panel.”

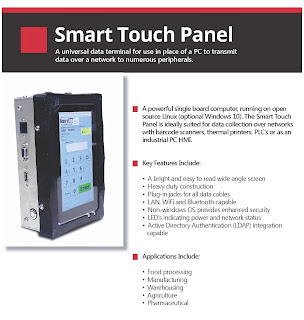
According to John, “ The Smart Touch Panel is a powerful, single board computer, running on open source Linux. The Smart Touch Panel is ideally suited for data collection over networks with barcode scanners, printers, or PLC’s.”  In our case, it’s great with the new C6000P printers.
Smart Touch Panel
Smart Touch Panel

Continuing, John says, “The Smart Touch Panel fits where an operator is applying a label by hand.  With the Peel and Present feature of the new C6000P, the printer prints the label and presents it ready to apply.  With the Smart Touch Panel, the operator doesn’t require a PC to operate; and fits where you don’t want the operator running a computer.”
Watch John start a print job and print here:


In this video, John has produced a label template and adds variable data such as lot, date, and/or shift codes along with a color code to identify the production date of the product easily.

“In the past, companies used this type of solution with preprinted labels using a thermal transfer printer such as Zebra to add the lot and other codes.  Now with the C6000P, manufacturers can start with blank labels and print the entire label on-demand just prior to use.  This system makes labeling with variable data easier to do”, says John.
You might find these earlier posts on the new C6000 series printers of interest:


https://colorlabelsondemand.blogspot.com/2020/02/my-new-c6500p.html

https://colorlabelsondemand.blogspot.com/2019/09/new-c6000-series.html

Smart Touch operates on a network with a server running a label software program such as Codesoft or BarTender.  This software creates the template that serves the data to the Smart Touch Panel to operate.  According to John, “the Smart Touch Panel works best in situations with multiple printers/stations running similar templates/printers”. 

The Smart Touch Panel costs $995 with $895 for the stand that holds both the printer and the panel.

If you have multiple stations applying labels by hand, consider not only the Smart Touch Panel, but also moving to color with the C6000P printers.  This new technology will save you time; and make your operation much more productive.
Contact us if we can help with the Smart Touch Panel or the C6000P printer.
Guy Mikel
855-962-7670

info@colorlabelsolutions.com 

My New C6500P

FYI: I received my first C6500P printer.

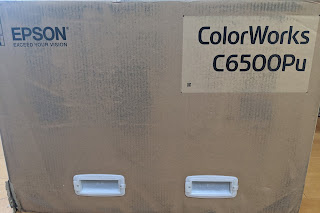
C6500P In The Box
C6500P In The Box


As I tested this exciting new technology, I thought you might find my out-of-the-box experience of interest. You might find my introductory post on the C6000 series printers of interest:  

After opening the box and removing the printer, I started the printer without ink and attempted to install the driver (Get the driver here);  but the driver would not install.  I realized quickly the install had to be done from the LED front screen and not the driver.  The initialization took about 20 minutes (longer than the C3500).  After the initiation process finished, I could install the driver; and learned the initiation process consumed about 50% of the initial ink cartridges (similar to the C3500).

C6500P Driver


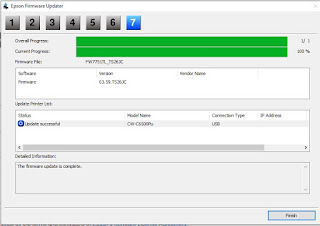
Once initialized, I checked the firmware version to see if it was up-to-date; it wasn’t.  It is not surprising as these printers are brand new to the market.  Epson has the updated firmware on the same site as the driver above.  After downloading the firmware, I installed the updated firmware.

C6500 Firmware Update

I found the firmware update process very similar to my inexpensive, Multifunction, WF-4720, Epson printer.

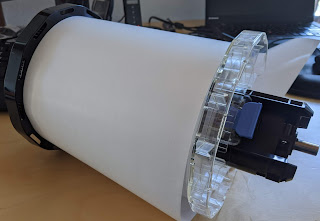
Now that the driver was installed and the firmware updated, I decided to print some matte paper labels.  I found loading the paper using the spindles very easy to do. (Note to self: we need to order more spindles). If you have ever used a LX2000, you’ll find the process with the C6500 much easier to do. (see my previous post comparing the LX2000 to the C7500.  Check out the paper loading section):

C6500 Media Spindle
C6500 Media Spindle


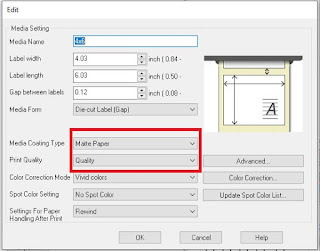
For the matte paper, I selected the normal quality setting;


C6500 Media Settings

In addition, I changed the Ink Profile in the Advance setting to the darkest setting.  I’d recommend this change on most all artwork and applications.

C6500 Ink Profile
C6500 Ink Profile

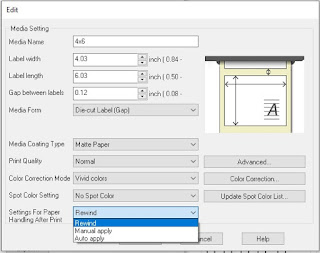
Finally, be sure to configure the settings to “Rewind” if you are not using the Peel & Present feature:

C6500 After Print Settings

Otherwise, the printer will tell you to remove the label.  If you don’t change this configuration, the next label will not print.  You can move the label slightly and the next label will print.
And found the print quality and speed (about the same as a LX2000) very good.

C6500 Matte Paper Labels

After my first print jobs, I loaded some gloss paper and printed both at the Quality and Max Quality.  I did notice a slight difference in colors; but very little.  Notice the differences in the green bar; and maybe the red block.  Frankly, I don’t think that vast majority of users will use the Max Quality setting.

C6500 Gloss Paper Labels

Max Quality on the Gloss Paper is the maximum print resolution and slowest print.  Watch these two labels print here:  

Now that I was printing labels, I tested the Peel & Present feature on the C6500P.  I changed the configuration in the driver to “Manual Apply”; and loaded the liner through the peeler.  The Peel & Present worked great!

C6500P Peel & Present Feature

No other color label printer offers this feature.  If you have operators on the line printing and applying labels by hand, this feature will increase productivity.  Please know: the Peel & Present version does not have a cutter.
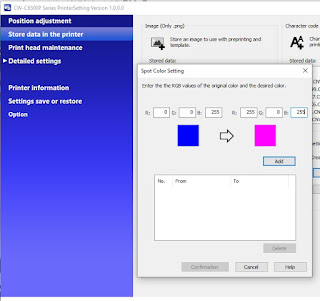
After using the Peel & Present feature, I tested the new Spot Color replacement capability in the Epson driver.  With this capability, the printer can change one color automatically.  In the Printer Setting Utility (Stored Data section), you establish an RGB value to replace an existing color.


C6500 Spot Color Setting

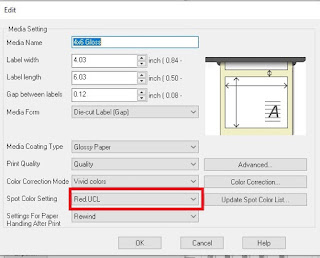
And then you select the color in the media definition section of the driver:

C6500 Spot Color Driver Setting

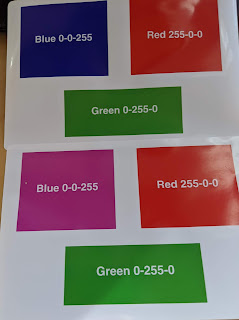
And you can change the print output colors without changing the artwork.  See how the blue block below has a different color.  Again, no other printer I know offers this capability.


C6500 Spot Color Replacement
C6500 Spot Color Replacement; Check out the Blue Differences
This feature seems to work only with artwork created as RGB, and not CYMK.  More to come on the Spot Color Replacement.
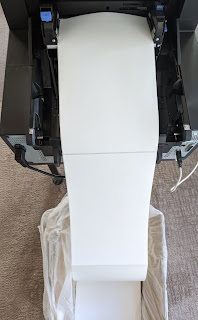
After all these tests, I want to try rear feed using very large drum labels; 8.375” x 13.875”.  Again, I see the C6500P as a perfect replacement for the C831 printer.  With large labels and rear feed, opening the media cabinet from the back was very convenient.

C6500 Rear Feed of Large Labels
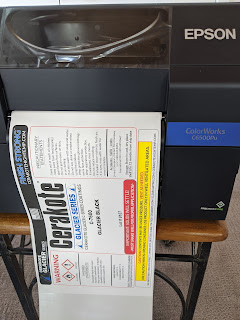
And using the Synthetic setting at the Normal Print Quality, I found the print speed faster than expected; probably faster than the C831. Watch me print this long label here:


And the print quality as well better than expected with the C831.

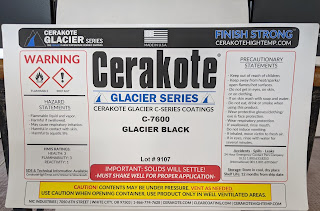
C6500P Print Quality on Drum Labels


After testing these large drum labels, I wondered how well the Peel & Present feature would work on 8.375” x 13.875” size.  Peel & Present seemed to work well.

C6500P Peel & Present-Large Drum Labels

This long label did stick to the liner below; but came loose when pulled.  The Peel & Present feature would seem perfect for chemical drum labeling.  I suggest owners of C831 printers upgrade ASAP.

Overall, my out-of-the-box experience with the C6500P was very positive.  High Print Quality, Easy Operation, Unique Features like Peel & Present, Spot Color Replacement and Multiple Door Openings make the C6500 a great alternative to printers from Primera such as LX2000, LX900 or LX1000; from VIP such as the VP485 and VP495; or from Neuralabel, the 300x.  If you have one of these printers, you should consider upgrading.  And I did not test several the new features; MAC driver, Remote Printer Management or I/O port.  We’ll get these tests done in the new future.  Be sure to see my post on printing with ZPL here:  

Contact us if you find the features of the C6500A or C6500P of interest.  We’ll make printing with these new technology printers easy to do.
Guy Mikel
855-962-7670

info@colorlabelsolutions.com 

Printing ZPL With The C6000

With Epson’s new C6000 color label printers, you can “colorize” ZPL to increase the readability, improve the look of your labels and even decrease the latency of your printing operation.

ZPL Printed With The C6000A

“Zebra Programming Language (ZPL and ZPL II) is a page description language from Zebra Technologies; and is used primarily for labeling  applications” says the Wikipedia page for ZPL.  Wikipedia says also, “A page description language (PDL) is a computer language that describes the appearance of a printed page in a higher level than an actual output bitmap.”

Zebra Printers Use ZPL

When introduced to the market, thermal transfer and direct thermal printers utilized these types of languages to produce the text and objects printed on the label.  To compete in the market, competitors to Zebra developed emulations and/or interpreters to enable their printers to “plug and play” in environments driven by software using only ZPL.  Now, Epson offers this capability in their new C6000 series printers without requiring the Windows driver.

Epson C6500P
Epson C6500P


Bill Vasques, Vice President, Software and Systems Development for General Data, demonstrated the different ZPL printing capabilities of the C6000A printer recently.
  • Printing native ZPL
  • Adding images/logos in ZPL
  • Adding color images/logos in ZPL
  • Printing objects (text, lines, logos, etc.) in color in existing ZPL


Watch Bill print these types of situations here: 


According to Bill, “Epson’s Escape Label is very similar to ZPL, but provides additional commands to add color to the ZPL.  And the additional code required to add color is very small.”  For example, Bill added a PNG image to the image itself to print the logo in the video; and he did not have to load the code into the printer itself.  Some time ago, I discussed uploading an image to the C7500 and running ZPL:
https://colorlabelsondemand.blogspot.com/2018/05/zpl-with-c7500.html 

Bill continued, “what is great about the Epson printer, the ZPL should produce label output that is no different than with Zebra printers. Now you can get higher resolution labels, eliminate the hassle of loading thermal transfer ribbons and save money compared to using resin or even wax/resin ribbons when printing black, text only labels.”

The new C6000 series printers offer other features that make replacing Zebra printers easy to do:

  • Peel and present

  • Remote printer management

  • SAP direct integration

  • I/O integration for print/apply and other applications

Learn more about the new C6000 series printers here:
Color Label Solutions merged with General Data in March of 2019 to gain access to the capabilities offered by our new parent; like what Bill shows with ZPL in the video.  Learn about our merger here:
The C6000 printer opens up the black only, thermal transfer printing world to color.  If you run Zebra printers in your factory, warehouse or other facility, now you should consider how colors, logo’s and images can improve the look of your labels; and make your labeling operations easier to do.  Contact us to discuss how moving to color will fit your operation.

Guy Mikel
855-962-7670


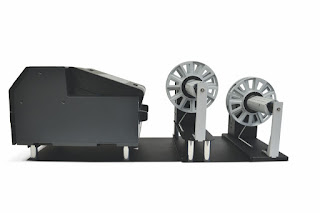
C6000 Series Winders

If you are considering the Epson C6000 series printers, you need to consider winders as well for this printer. DPR has both unwinder and rewinder for these important new printers.
C6000 Winders DPR
C6000 Winders
 Watch the video of the DPR winders here:  


Or a shorter version here:
 

Given the 8.375” C6500A and C6500P printers come with only the capability for a 6” OD, I believe many if not most users of these wider printers will want an unwinder to enable larger rolls.  You can order either the unwinder, rewinder or both.  A plate is required for any of the 3 possible setups to ensure the labels are fed into or out of the printer straight.

C6000 Unwinder
C6000 Unwinder
When asked why the rewinder is behind the unwinder, Michael Panzeri, Vice President of DPR, said, “With the rewinder in the back, it enables the user to wind either the label itself or the liner if they are using the Peel and Present mode.  Further, it enables the label to be wound either face in or out.  The rear rewinder makes this configuration very flexible.” 


C6000 Rewinder
Michael did say that DPR will release another rewinder for the front of the C6000A or C6500A that will sit in front.  This front facing rewinder will prevent any predispensing of labels during rewinding using the cutter versions of the printer.
If you don’t know about the C6000 series printers from Epson, learn more here: 

C6500P
C6500P

To purchase the DPR unwinder for the C6000 printers, visit our store: 

To purchase the DPR rewinder for the C6000 printers, visit our store here:

And don’t forget to purchase the plate:

With the unique capabilities,
  • High print resolution
  • 8.375” max print width
  • Peel & Present
  • MAC, Linux and SAP connectivity
  • Spot Color Replacement
  • Network Management
  • ZPL datastream printing
The C6000 series printers will be a big hit in the label print market.  Purchase your C6000 printers here:

Or contact us to learn more about the C6000 printers and the DPR winders.
Guy Mikel
855-962-7670

Preroll Label Applicator

If you produce and sell prerolls, you know the hassle of applying labels to these tubes.  With the CTM Tabletop Wrap Label Applicator, you can eliminate this tedious and costly activity.
CTM Wrap Label Applicator
Watch this applicator apply labels to our customer’s CoolJars tubes:


When our customer first saw this video, their response was “Awesome”!  This customer has production lots of 30,000+ prerolls.  Further, they have to begin applying batch ID’s on their tubes prior to receiving their test result data which is included on the final label.  This applicator will make applying both of these labels much easier.
You might also like to watch the CTM video of this label applicator.


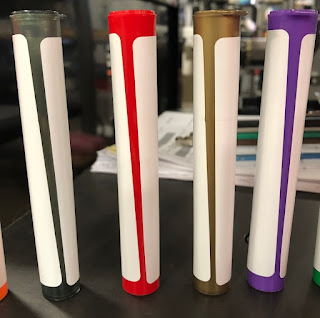
And look at some of the applied labels on a different tube size.


Auto Applied Labels on CoolJarz Prerolls
Auto Applied Labels on CoolJarz 116 mm Tubes

The Tabletop Wrap Label Applicator works as follows:
“Round products are manually loaded onto the infeed magazine. The indexing starwheel will remove one product at a time from the infeed magazine with each indexing motion. Once products have been captured by the starwheel, they are indexed to the labeling station where a powered roller spins the product as the label is applied. Labeled products will then continue around the starwheel until they fall onto the exit chute where they will fall into a collection hopper (collection hopper or box is not included.)”
What I find great about this applicator is the “Machined Starwheel”.  This component is machined for the exact tube you have; even those tubes with a taper.  The capability to change the Starwheel allows for many different tube and label sizes.
Although named “Tabletop Wrap Label Applicator”, this machine is not small:  40″ H, 48″ W, 25″ D and weighs 250 pounds.  It does need to sit on a sturdy table for easy operation.
With tapered tubes, you do need to consider your label sizes as well.  If you place a rectangle label on a tapered tube, you’ll get a gap that is not consistent top to bottom:

Rectangle Labels on Tapered Tubes

To eliminate this inconsistent gap, plan on using tapered labels.  For example, we would recommend on this tube a label size of 4” x (2” on bottom side and 2.25” on the top side were the tube is larger).  Using this taper label, you will make the gap consistent and potentially more visually appealing.  We can work with you to insure the label fits your tapered tube.
As a producer of prerolls, you can save a lot of time and money by automating your label application.  Contact us to discuss how the CTM Tabletop Wrap Label Applicator can work for you.
Guy Mikel
855-962-7670

info@colorlabelsolutions.com 

MJBIZCON 2019

MJBIZCON2019 was a big success for Color Label Solutions, as we spoke with hundreds of customers and prospects during the event. 


MJBIZCON 2019 Booth
MJBIZCON 2019 Booth

Although a lot of work, MJBIZCON gave us the opportunity to learn more about our customers and prospect’s needs; and discuss what we’re offering.  To those of you who missed the show, you may find interesting what we covered with the people who visited our booth.
First, the QL-300. 


QL-300
QL-300
We printed a variety of materials:  Silver Poly, Silver paper, gold paper, clear film, grass paper, black paper and even hemp paper.

QL-300 Printed Silver Foil
 And much of our artwork utilized white:

QL-300 Printed Black Paper
Many of the visitors to our booth generally appreciated the appearance of these labels; especially the printing on the different materials.  Learn more about the QL-300 here. 

Purchase the QL-300 here: 

Second, we discussed the new C6000 and C6500 printers that are coming beginning in January, 2020.

C6500P
C6500P
Many of our cannabis customers and prospects needs the high print resolution offered by the C6000 series;

4×6″ Gloss Poly Label Printed with the C6000

combined with the durable ink, service offerings and affordable price from Epson.  We believe these new printers will fit many of our customers.  Learn more here:

If you use a LX900, LX1000, LX2000, VP485, VP495, or even a C3500/C831, you should consider upgrading to the new C6500 printers.  And if you use a Zebra thermal transfer printer, consider using this printer for an easy move to print on-demand color labels.

Place your order for the C6500A (8.375” wideprinter with cutter) printer here: 


The C6000A and C6000P (4.25” wide printers with either cutter or peel and present) are due out in April 2020.
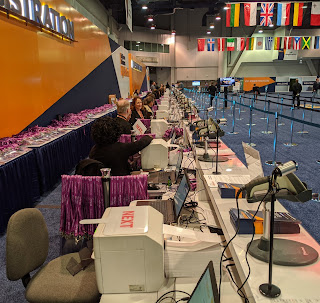
Third, we discussed the affordable, C3500, which are customer used to print badges at the registration desk for MJBIZCON:
C3500 Printers at MJBIZCON Registration Desk

And our gloss paper tags printed great on the reliable, C3500 printers:


C3500 Gloss Paper Badge

If you need to print text, barcodes and small images on a basic white label or tag, the C3500 is the prefect tool.  Purchase the C3500 here:  

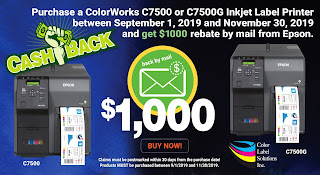
Fourth, we had a lot of people interested in the current $1,000 rebate on the C7500 and C7500G that Epson extended to December 31, 2019:

C7500 $1,000 Rebate
C7500 $1,000 Rebate 


Purchase by the end of the month to qualify for the $1,000 rebate.  These workhorse printers have never been less expensive.
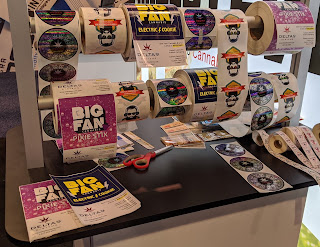
Finally, we showed people examples of our preprinted color labels; produced both with analog and digital presses:


Preprinted Labels from Color Label Solutions

If you need labels printed, contact us.

MJBIZCON was a great success for us.  If you did not attend MJBIZCON, I hope you found this summary of what we showed and discussed in our booth of value.  

And if you attended and met with us, I hope this information acts as a reminder of our discussion.  Contact us to learn more about any of these items; or discuss your label printing requirements further.
Guy Mikel
855-962-7670

A High Level Conversation

“A High Level Conversation” is a new podcast series powered by Delta9 Systems, the Cannabis division of General Data Corporation, hosted by Chris Guthrie, General Manager.


I’ve written about Chris and Delta9 Systems in the past.

According to Ashley Crosh, Marketing Manager for General Data and producer of this podcast, “our goal of this podcast series is to gain credibility and visibility within the cannabis industry.  We’re combining our expertise in data management and barcode systems with Chris’s in-depth understanding of the cannabis business to elevate producers, processors and retailers to a higher level.”

For their first episode, they invited me on the show for a discussion of the critical labeling elements within the cannabis market.  It was the first time that I’ve participated in the a podcast; and was a fun experience.  Listen to the full episode here. 
After participating in the podcast and listening to the final version, I have three thoughts.  First, I didn’t know that Zebra would be featured; and I found the partner idea fantastic. 
According to Ashley, “we pitched Zebra on the idea of a podcast surrounding the impact of new technologies within the cannabis industry.  We understood that Zebra wanted to pursue the cannabis vertical market; and needed a strong partner/means to approach.  Zebra was very supportive sending an agency to our recording sessions to help guide and support the process.”   After listening to the podcast, I believe getting Zebra involved was a great idea.

Second, I had a lot of ideas on topics we could have explored during the episode after we completed the recording.  Dale Carnegie said, “There are always three speeches, for every one you actually gave. The one you practiced, the one you gave, and the one you wish you gave.”  Here are some of my thoughts:
What does it take to create a great label?

This post features ideas on how to improve print quality

Why is branding so important in cannabis?


Why is variable data so important in cannabis?
This post from some time ago reviews the California label requirements for cannabis products


How can I save money when purchasing labels?


Third, podcasts take a lot of work to create.  Now with over 260 blog posts, I understand the work involved in content creation.  Ashley says, “A podcast series was an idea that I thought Delta9 should pursue.  After discussing with my manager and Chris, I worked with my partners to pursue the idea and create the content.  We now have 5 episodes released with more to come.  Creating A High Level Conversation has been a great learning experience for me.”
If you like this episode (or want to hear someone besides me), visit the Delta9 Systems site.

Or visit Apple Podcasts, Spotify or any of your other favorite podcast listening platforms and search for “A High Level Conversation”.  If you like what you hear, please subscribe and leave them a nice review!
I’d appreciate your feedback and comments on this episode and the series.  Feel free to contact me with your comments.
Guy Mikel
855-962-7670


Boxmate

Recently, I saw a new product that would seem to fit a lot of our customers: the new Boxmate from Labelmate:


We’ve sold a lot of round bottle applicators; and featured several in this blog.  For example, this work on integrating a color printer into an automatic label applicator:

Or this post featuring an integrated semi-automated label applicator:

Or this post featuring the BenchMax:

But until now, we’ve not sold an easy to use, semi-automatic box label applicator like the Boxmate.


According to Stuart Ripplinger, General Manager of Labelmate, “BOXMATE Label Applicators enable you to consistently and accurately apply labels automatically to a wide variety of flat-sided items, such as boxes, pouches, and flat-sided bottles. In the past, automatic Label Applicators like this could only be found for cylindrical items like bottles and tubes; but no longer!  With the BOXMATE by LABELMATE you can reliably and effortlessly label all kinds of square and flat objects by simply placing them on the conveyer and watching the machine do the work. Once the conveyer is activated the label is applied at over 4.5″ per second, and most objects are labeled in less than 4 seconds!”
Watch the Boxmate run in this video:

When I ask Stuart, who are the best candidates to use the Boxmate, Stuart says, “BOXMATE Label Applicators are the ideal solution for anyone who needs to apply labels to small and medium sized cartons, boxes, and any other type of flat-sided object.”  From my perspective, I see cannabis, food, hardware and many retail-oriented companies as perfect candidates for this inexpensive box labeler option.

The Boxmate comes in two sizes.  First the Boxmate 610 for boxes up to 6” wide, costs $3,500: 

Second, the Boxmate 612 for boxes up to 12” wide, cost $3750:

Boxmate is a great new addition to our toolbox for customers who want an affordable means to apply labels to boxes.  Contact us to purchase or learn more about this new tool.
Guy Mikel
855-962-7670

Label Expo 2019

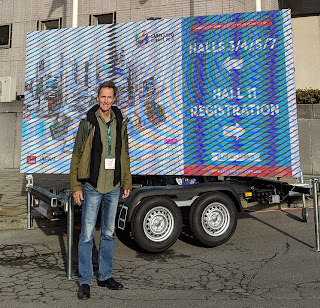
Last week, I attended Label Expo in a short, whirlwind trip to Europe:

Guy Mikel at Label Expo
I’ve attended Label Expo many times, both in Europe in 2017.

And in the US in 2012, 2014, 2016 and 2018.

And I’ve already written about the Epson C6000 introduction at Label Expo and Pack Expo.

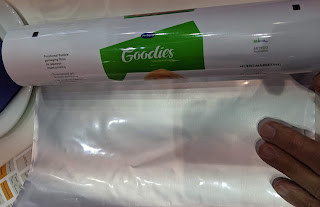
For me the most interesting aspect of this year’s Label Expo was the focus on Print On-Demand Color Flexible Packaging.  We launched this capability at WestPack last year:

However, food safe packaging was not available; but now it is.

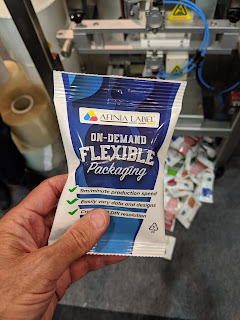
Foil-Lined, On-Demand Color Flexible Packaging

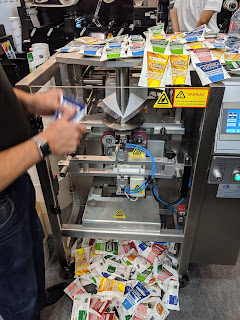
Now we can get fully air/water proof packaging with the foil-lined material.  100% water and air tight; with no migration of the ink through the packaging.  I see this material as key to the growth of this new market.  Plus, this material seals well in both horizontal and vertical filling/sealing equipment as seen in the Afinia booth:

Vertical Filling/Sealing Flexible Packaging Equipment

On-Demand Color Flexible Packaging

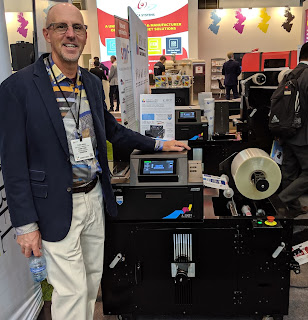
The reason this equipment as in the Afinia booth as they launched new equipment for this market: a L901 with a lamentation station with a cost of approximately $30,000.

L901 with Lamination Station

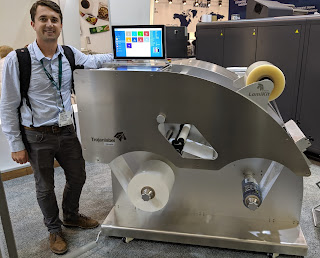
Interesting enough, Trojan showed their new T2-L; made for this market as well.


T2-L with Lamination Station
Trojan was the first to demonstrate this new capability using the first of this new inkjet coated packaging material.  You may remember this video from last fall:

Both companies have added the lamination station to insure the ink does not transfer after printing from the front to the inside of the material during rewinding.  Once laminated, it is impossible for the ink to come into direct food contact.  If you would not want to laminate, it may be possible to print and feed the material directly into the filler/sealer unit by controlling the printer using the I/O interface on printers such as the T2-C:

T2-C I/O Interface
This new market excites me as the same drivers as the on-demand color label business.  Companies want to eliminate large quantities of preprinted flexible packaging; as well as add variable data or images to their products.  On-Demand Flexible Packaging makes this possible for the food and other industries.

Besides On-Demand Flexible Packaging, I discovered one other unique new product; from of all companies, Primera.  Primera launched the new printer/die cutter, the LX610.

Primera LX610 Print/Die-Cut
With this printer, you can print, then die cut labels in one pass:

LX610 Print/Die Cut
X610 Print/Die Cut
Frankly, this printer is slow and the ink cost would appear to be relatively high.  Therefore, the LX610 would not fit production quantities.  However, I can imagine this printer working perfectly for prototypes and very limited production quantities.  The LX610 is not available for sale as of yet.
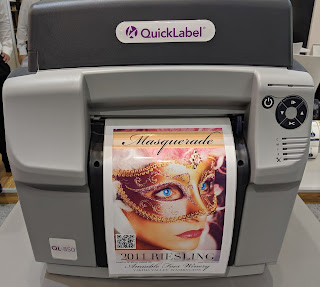
One other new color label printer I saw was the QL-850. 

QL-850 With Natura Ink
The QL-850 is an upgrade/fix of the previous printer, the QL-800.  This printer is interesting given it uses the more durable, Natura dye-based ink.  It’s a new generation of ink used in the T2-C.  Great print quality, interesting footprint/size.  But this printer is relatively expensive at $13,000 and uses ink cartridges and not tanks.  I’ll need to do some further testing to see how this printer performs; but very interesting option.
In addition to equipment, I saw two materials that were unique for the on-demand color label business.  First, inkjet coated Tyvek.

Inkjet Coated Tyvek
Inkjet Coated Tyvek
In the past, I’ve tried to print Tyvek; but it printed poorly and the ink smeared.  But this new inkjet coated material prints beautiful.  Tyvek doesn’t tear and is very soft; Perfect for apparel tags and wristbands.  And maybe even for durable rebar tags.

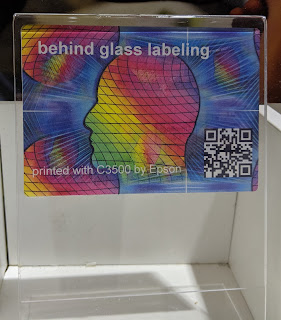
Second and in addition to the inkjet coated Tyvek, I saw behind the glass labels.  

Behind the Glass Labeling
My German friend has sold a lot of these labels into the Middle East to print variable data on automobile parking stickers. According to him, these labels do not fade quickly given the window stops much of the UV light.  Let me know if you have any interest/need for these types of labels.
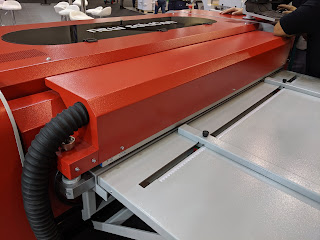
Lastly, New Solution showed their new additions to the NS Multi:


NS Multi Deionizer Unit

I’ve written a lot about the NS Multi in the past: the best available print on-demand corrugated printer.


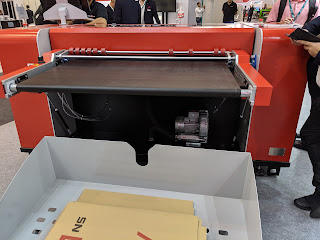
First, New Solution added a deionizer to remove particles from the corrugated (see above). This addition helps extend the life of the printheads and even the entire printer.  Second, New Solution added a larger vacuum to hold the material down better under the platen.


NS Multi Vacuum Pump

These two additions should make the NS Multi more productive and effective in printing corrugated on-demand.
I hope you find this summary of Label Expo 2019 of interest.  Contact us if you want to discuss any of these new capabilities further.
Guy Mikel
855-962-7670

info@colorlabelsolutions.com 

New C6000 Series

On Monday September 23rd, 2019 in Las Vegas at Pack Expo:
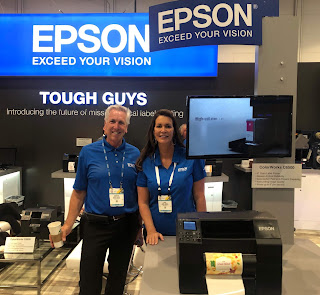
Epson C6000 Launch at Pack Expo
 and Tuesday September 24th, 2019 in Brussels at Label Expo Europe:
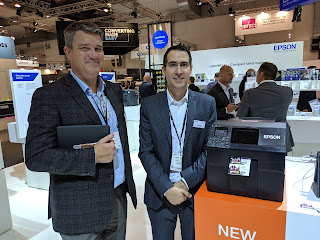
Epson C6000 Launch at Label Expo Europe:

Epson launched a new series of 4, on-demand color label printers to their ColorWorks lineup; The C6000A (4” version with Automated Cutter), C6000P (4” version with Peel/Present), C6500A (8” version with Automated Cutter), and C6500P (8” version with Peel/Present).  Read the Epson press release here:
Epson Press Release:

https://news.epson.com/news/colorworks-c6000-series-color-label-printers
Learn more here on the Color Label Solutions page:
https://colorlabelsolutions.com/epson-c6000-and-c6500-color-inkjet-label-printers/ 

Epson page:

According to Epson, the C6000 series are the first color label printers designed to replace black-only thermal transfer printers. Epson American has dubbed them, “The Tough Guys”.
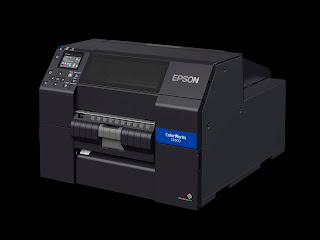
Epson C6500P
Having worked with these printers briefly, I see the following capabilities that make the C6000 series great new additions to the on-demand color labeling world.
First, the C6000 series offers up to 1200 x 1200 dpi resolution; providing high resolution, print output comparable to preprinted labels.  Higher print quality has been one of the missing elements from earlier printers, especially in the wider print widths.
Second, Epson has decided to offer the C6000 series at a very affordable price; under $4,000.  From $2,580 for the C6000A to $3,980 for the C6500P.  With an 8” wide version at this price, we see a real fit with many of our customers.
Third, the C6000P and C6500P come with a Peel and Present capability, making labeling easier to do for operators. Now, operators can send a large batch print job; and then pull each label from the printer already peeled.  No other color label printer offers this capability.  Watch the Peel/Present function here:


Fourth, the C6000 offers Remote Printer Management, enabling organizations to manage fleets of printers.  Checking consumable status, updating firmware, confirming errors, etc. is possible from a central location using the C6000 series of printers.  No other color label printer offers this capability.
Fifth, the C6000 enables integration with ZPL (Zebra Print Language).  This capability enables organizations to use the C6000 as a “Plug & Play” option for applications normally reserved for thermal transfer printers.  Users can upload images that would normally be preprinted; and then send the same ZPL to print colorized labels on demand.  Learn more about how I did this process using the C7500:

Further, the C6000 series integrates with SAP “out-of-the-box”.
Sixth, the C6000 offers I/O capabilities to enable integration into automated workflows.  Now, automated label applicators can be built to integrate these color label printers; especially with the “First Out”, Peel and Present capability in the C6000P and C6500P.  No other color label printers offer this combined capability.

Together, the third, fourth, fifth and sixth capability discussed here make the C6000 series a good option for thermal transfer printers; especially thermal transfer users with a large number of preprinted labels in inventory.  These customers can print labels on-demand versus keeping them in inventory.  According to Victor Gomez, Group Product Manager for Color Labels at Epson, “the ink costs of printing labels with the C6000 are less than or only slightly more than using a thermal transfer ribbon; especially after the increase in resin prices.”
According to Andy Scherz, senior product manager, Commercial Label Printers, Epson America, Inc. “The new family of ColorWorks on-demand label printers provides an easy transition for customers looking to make the switch from black-only, thermal transfer printers, with similar media handling capabilities, speed, features, and connectivity options.”  With the launch of the C6000 series, thermal transfer users should consider moving to these new, on-demand color label printers.
Seventh, the C6000 printers now come with both MAC and Linux print drivers.  Over the past several years, a MAC driver has been a very frequent request.  Many graphic designers use MAC’s; and now they can print labels directly from their MAC Books.
Eighth, the C6000 offer “Spot Color Replacement” option.  Now in the C6000 driver, operators can easily change the RGB color without changing the original artwork.  Further, advance users will be able to upload ICC Color Profiles.  ICC Color Profile is a set of data that characterizes a color input or output device, or a color space, according to standards promulgated by the International Color Consortium (ICC).

No other desktop or benchtop color label printers offers this capability.
Ninth, the C6000 series comes with the same durability and reliability seen with both the C3500 and C7500 printers.  Further, Epson service offers both Spare in the Air (SITA) and On-Site warranty; making these printers easier to use and to keep running. 
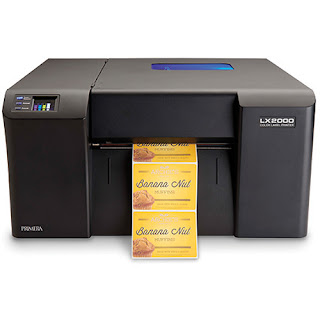
LX2000 Color Label Printer

Combining the points one, seven, eight and nine make the C6000 series a great alternative to the LX900, LX910, LX1000, and the LX2000 from Primera.  In the past, Primera printer’s higher print quality has made them a good option; even with their higher ink costs.  Read my earlier comparison of the C7500 to the LX2000 here:  https://colorlabelsondemand.blogspot.com/2017/09/lx2000-vs-c7500.html
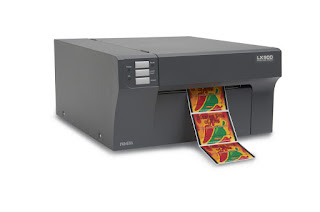
LX900 Color Label Printer

Also, ink costs for the new C6000 printers are lower than Primera printers.  According to Jacob Kalleris, Product Manager for Epson Europe, “Current Primera customers will save a significant amount of money for ink by moving to the new C6000 printers.”
In addition to alternatives to thermal transfer and Primera printers, the C6000 series printers offer users of other label printers a good option.  The most obvious replacement target for the C6000 are users of the C831 printer.
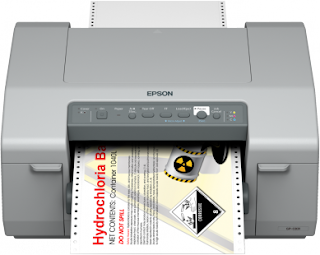
C831 Color Label Printer

The C831 has performed well for chemical manufacturers to produce GHS labels.  Now the new C6500 (P or A depending on the requirement for peel and present), makes printing GHS easier to do (i.e. clearing any potential jams) and produces higher resolution print quality.  Plus, users will save money on their labels as the C6500 doesn’t require pin-feed media.    Moving to the C6500 from the C831 should be an easy decision for most users.
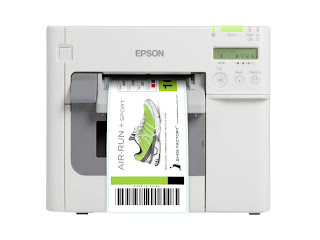
C3500 Color Label Printer

Besides the C831, certain users of the C3500 should consider upgrading to the C6000P.  The C6000P will offer higher print quality, peel & present and Fleet Management capability.  With these three advantages, many C3500 printer users should upgrade to the C6000.
Overall, the new C6000 and C6500 label printers offer users several very key benefits.  If you currently use the C831 printer, a C3500 printer, one of the Primera desktop printers (LX900, LX910, LX1000, and the LX2000) or a thermal transfer printer who wants to colorize their print output, consider upgrading to one of the new C6000 printers.  Epson says we can begin shipping the C6000 printers by January.  Watch our store for when we start taking orders for the C6000 printers:


Shortly, we will receive a demo C6000 printer; therefore, look for more testing commentary from us.

If you are interested in learning more about the C6000 printer for your operation, contact us.  We look forward to working with you to see how these exciting new color label printers fit your operation.
Guy Mikel
855-962-7670

QL-300 Full-Bleed

Printing full-bleed labels can be difficult; especially with a newly launched printer.  The QL-300 is the first LED/Laser printer designed specifically for desktop label printing. It is capable of printing full bleed labels by following some easy steps.
QL-300 Full-Bleed
QL-300
I’ve written about the QL-300 in the past.  This article features the key benefits of the QL-300, printing foils and other interesting label media; and printing using white.

And this post covering designing with white:

The most important aspect for full-bleed label printing, even with the QL-300, starts with the artwork.  You need to create artwork slightly larger than the actual label. Generally, we recommend using artwork that is .03” larger than the actual label. For example, use a 3.03” x 4.03” artwork for a 3” x 4” label.


Full-Bleed Label Artwork

With this type of design as a PDF, you can print at the actual size in Adobe Reader.


QL-300 Full-Bleed PDF Printing

Starting with the correct artwork makes full-bleed label printing easier to do.
With the QL-300, three other aspects are important for full-bleed printing; two are different and one is similar to other printers.  First, the QL-300 requires the matrix left-on the labels.  Label matrix is the waste material that is typically pulled off from die-cut labels. Here is the matrix surrounding the label.

Matrix-On Label
Matrix-On Label

And the label partially removed to show just the remaining matrix:


Label Removed To Show Matrix

Matrix On is required because the toner on the liner does not get fused and may eventually cause problems in the fuser. Matrix On allows for overprinting and keeps the fuser clean. 
I’ve written about leaving the matrix on in the past.

Second, the QL-300 requires an extra or larger gap between and around labels.  Most die cut labels have a .125” gap between labels with a .0625” exposed liner on both sides.  With the QL-300, the gap needs to be .375” and approximately .1875” on both sides of the label.  You can see this extra space/matrix in the above picture. This extra space ensures the toner does not get into the paper path, reducing print quality and potentially damaging the fuser/printer.

Third, the .125” blackmark needs to be placed halfway between the labels; basically starting .125” after the previous label and ending .125” before the next label. You can see the blackmark easily with this clear label

Blackmark Through Clear Film Label

With the correctly designed artwork, matrix on and the larger gaps, you can print beautiful full bleed labels with the QL-300. 

Full-Bleed Printed Using Clear Film Label
After printing, you may need to move the image around the template for perfect placement on the label.  For full-bleed printing, expect you’ll need to adjust the “paper print adjustment” to move image on the label.  With the QL-300 driver, it’s easy to adjust the position of the printed image:


And changes in the position adjustment direction show up in the label image to the right; which is a very helpful feature.
I’ve written about adjusting the printed image on the template for theL801 in the past.

With the matrix on, you may need to remove it prior to any automatic label application.  Applicators will not work with the matrix on.  To remove the matrix, the QL-300 has an accessory to pull this waste material off the liner.

QL-300 Matrix Remover
This matrix remover works similar to the accessory featured in this earlier post.

The QL-300 produces beautiful labels on a large variety of materials; and can print white.  It’s a very unique label printer and maybe perfect for your operation.  Following these technics, you can print full-bleed, producing great-looking labels.  Contact us if you have questions about the QL-300.
Purchase the QL-300 here.

Guy Mikel
855-962-7670

Color-On-Wheels

Recently, one of our customers inspired us to look into a set of interesting applications:  Color-On-Wheels.

Color-On-Wheels
Color-On-Wheels

I’d like to describe in this post possible applications and their benefits of moving a color printer to label at the point of activity.

To prepare for this post, I spoke with Kevin Ledversis, Sales Director for Newcastle Systems:  https://www.newcastlesys.com/.   


Newcastle Systems is an innovator of workplace mobility solutions for many of the world’s leading retail and operations companies. As the leading provider of Mobile Workplace© solutions, Newcastle Systems provides the means to dramatically improve employee and facility productivity without major changes to your infrastructure, software or processes.  A Newcastle Systems’ Mobile Workplace© facility requires less equipment and less power to do the same work as a standard workplace configuration.
According to Kevin, moving the printer to the point of activity is a key part of “lean” and “process improvement”.  Kevin says “mobile work stations enable organizations to label at the point of activity. It makes no sense to use handheld computers and cell phones in manufacturing plants and distribution centers; but have printers remaining static and fixed.  It’s time to change this mindset. This process improvement step saves time and reduces or eliminates labeling errors.”  This process improvement idea can be used for many applications; let me discuss a few here.
To me, the most obvious color labeling application is Finish Good Labeling, especially with large items such as chemical drums or mini-bulk tanks.  Typically, this type of manufacturing operation would print labels in batches and then take the labels out to the shop floor to apply them to the finished products.    However, it would be easy to apply the labels to the incorrect finished goods, creating a potentially serious issue or at least a return item. By moving printing to the point of application, you eliminate the costly steps/time to and from the printer but also reduces or eliminates labeling errors.  Further this process eliminates the inventory of preprinted labels kept in inventory.
  

Label Inventory
Label Inventory


Newcastle has produced an interesting case study featuring Grant Industries.  Contact me to get this PDF or download the study here: https://www.newcastlesys.com/finished-goods-labeling

And if you are applying paper labels to large items, you might find this earlier post on proper label application of interest: 

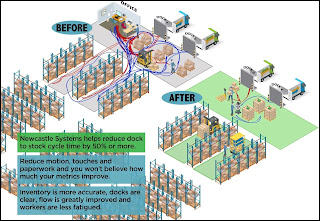
Another possible application for Color-On-Wheels is in Receiving.  Most manufacturing facilities will print labels in a central location, and then take them to the dock for application, wasting a significant amount of time and effort.  Newcastle shows this wasted time/labor in this illustration:

By adding color codes to this mix, you can improve the accuracy of both put away and picking.  And with label creation software, you can automate the selection of a color for each area of the warehouse.

In addition to color codes, you can add images to the pick tickets to improve the accuracy of this error prone step.  In one of my first ever posts, I wrote about Marco Specialties use of images to improve picking: 

Further, you can use Color-On-Wheels application to apply replacement brand labels when OEM products are received.  Relabeling while receiving reduces or eliminates potential errors later in the warehouse or during shipping.

In addition to Finish Goods and Receiving, manufacturers should consider using Color-On-Wheels for Work-In-ProcessLabeling.  At some plants, work-in-process inventory/QA Testing requires labels to be applied to describe the status of the inventory (i.e. quarantined).  Here is an earlier post on this application of color labels.  https://colorlabelsondemand.blogspot.com/2014/09/work-in-process-color-labels.html

Typically, these labels are printed or stored in a central location and the operator walks to/from the inventory location to apply.  With Color-On-Wheels, you can move the printer to the point of work to reduce or eliminate errors as well as save time and labor.
Shipping is another popular application for powered carts; printing both the shipping labels and documents.

Mobile Shipping Cart
With mobile carts, you can process orders at the pallet, increase shipping accuracy and remove wasted time and motion.  By adding color to the staging process, you can increase the accuracy of deliveries as well by color coding the shipping labels during staging:

Color Coded Shipping Labels
 And color coded the shipping documents:


Color Coded Shipping Documents
A very long time ago I worked on a case study of Tubelite and their shipping process: https://colorlabelsondemand.blogspot.com/2014/09/work-in-process-color-labels.html

According to Kevin, “very few companies use color in their shop floor and warehouses.  But it seems to be an easy way to add efficiencies to the processes in these important areas.  Plus, you can use existing wireless networks, software and hardware (may need to add a color label printer) to enable workers and improve process flow.”

And for the cannabis market specifically, I describe how mobile work stations can improve growing operations in this recent post: 

If you can imagine the possibilities of “Color-On-Wheels”, contact us to discuss how combining color label printers and a mobile power cart from Newcastle Systems can improve the operations of your business.
Guy Mikel
855-962-7670

LabelWorks

Color Label Solutions has started recently selling a different type of Color Labels:
LabelWorks Color Label

From Epson LabelWorks, https://labelworks.epson.com/for durable, professional labeling that gets the job done safely and professionally with a wide variety of supplies and lifetime warranty of the printers.

I’ve known of the LabelWorks product line for some time.  However, we did not pursue reselling this line of products until one of our large customers requested more information.  Our customer needed a means to add a barcode to every shelf location to improve picking and put away. To perform this operation, they wanted a mobile printer with a way to create labels on the fly.  Originally, they requested Dymo printers; but I suggested LabelWorks.  Warehousing and distribution are key applications for the LabelWorks product line.
Based on the customer’s requirements, I suggested the LW-PX400 label printer.

LW-PX400
LW-PX400
Melisa Coffman, Training Manager for the LabelWorks division of Epson, says, “The LW-PX400 is great for people on the go, its compact and easy to bring with you if you’re traveling or just moving around the facility, store it in your tool bag or laptop case and bring it with you anywhere! Its also great on a desktop because its small footprint takes up very little space, but has a ton of capability. Great for those with strict guidelines for installing software –by allowing the user to use their smart device to create and print the labels –and they don’t have to jump through hoops from their IT personnel to use it!”
Learn more here: https://labelworks.epson.com/epson-lw-px400/.   The LW-PX400 offers up to 1” print width, and works both USB and wirelessly with any iOS or Android device.  Plus it comes with free Label Editor software.  You can request the Label Editor software here: 

Finally, this printer is inexpensive; costing only $169.  Purchase the LW-PX 400 here: 

Based on the customer’s requirements, I got a LW-PX400 myself:

LW-PX400
LW-PX400
To use the printer, I loaded the labels first; a 1” yellow durable vinyl label.

1
1″ Vinyl Yellow Tape
And connected via USB to my computer.  Then I installed the Label Professional Editor Software and designed my first label; my name along with a QR code with our company’s website.

Label Professional Editor Software
 And then I printed my first label.

All within probably 15 minutes.
After using the Label Editor Software, I loaded the Epson iLabel app on my phone:


iLabel Android
iLabel Android
And repeated the process of making a label and then printing a label.  But this time, I printed using Bluetooth connectivity from my phone to the LW-PX400.  In a very few minutes, I printed a second label.

iLabel Software Printed Label
And I then learned that Google’s camera reads QR Codes:

Epson’s iLabel for Android/iOS and Label Professional Editor make creating durable labels easy to do; and fun!
For the LW-PX400, Epson offers 129 different types of labels: Materials, Widths and Colors.  You can find and search all the different label options here: 

Given all the different types, I asked Melissa Coffman about the different options.  According to Melissa, “Here are the types of labels we offer to our customers.
    1. Standard Tapes –Available in a wide variety of colors and sizes, used for labeling anything and everything. From files, shelves, products, safety and facility labels to 5S and everything in between. Color coding, etc. Whether you want it to stand out or blend in –there is a perfect tape for the application.  
    2. Heat Shrink Tube – For labeling wires and cables –Think Electrical, Data-Com, panel builders and IT people (just to name a few)
    3. Magnetic Tape– Inventory Management for shelves, bins, mailboxes, lockers. For locations that are constantly changing and/or being moved and reorganized –Magnetic is awesome! No sticky residue left behind.
    4. Fluorescent Tape – For all of those applications that really need to stand out and bring attention to it. Or just for something fun and different. These are my personal favorites!
    5. Vinyl Tape – Ideal for curved surfaces, outdoor applications, wires, cables and any of high traffic labeling jobs, the vinyl tapes will withstand some serious wear and tear. They are also a little more matte finish making them easier to read in bright environments.
    6. Self-Laminating Wire Wraps – Cables and wires that need to be labeled but can’t fit a HST on.  In these situations, a self lam is the way to go. Installers and repair people live for these tapes (now available in more flexible vinyl)
To purchase supplies for your LW-PX400, visit our store:

So far, we have only a small segment of the tapes Epson offers on our store.  If you something different for your LW-PX400, contact us.  We’ll add what you need to our online store; or send it to you directly.
In addition, we’ve listed so far only the LX-PX400 in our online store.  Learn more about the 7 other Epson LabelWorks printers here: 

Depending on your requirements, we’ll find the best printer for you.
And you can use these printers all across your organization.  For manufacturers like many of our customers, the LabelWorks team recommends these possible applications:
1. Pipe Markers
2. Machine Controls
3. Production Tracking
4. Equipment Labels
5. Operating Instructions
6. Quality Control Tags
7. Assembly line Classification
8. Process Control Instructions
9. Tooling Information
10. Tool/Part Cribs
11. Raw Materials
12. Inspection Certificates
13. Assembly Instructions
14. Gear Labels
15. Gauge ID
16. Hoist Operating Instructions
17. Cable Flagging
18. Job Tracking
19. Operating Guidelines
20. Production Charts
21. Scrap Bins
22. Parts-in-Progress Tags
23. Time Card Slots
24. Production Control Boards
25. Capacity Planning Boards
26. Locker Labels
27. Hard Hats
28. PPE/Safety Clothing
29. Lean/5S Visual Workplace
30. Safety (OSHA/ANSI)
31. Calibration Labels
32. Secondary Container ID
And for Warehouses like our first customer, the LabelWorks team recommends these possible applications:
1. Vertical/Horizontal Racks & Shelves
2. Asset ID/Management
3. Parts Bins
4. Modular Drawer Bins
5. Drawer Pulls
6. Cabinets & Carts
7. Containers
8. Lot Numbers
9. Aisle Markers
10. Storage Requirements
11. Handling Procedures
12. Pallet Labels
13. Equipment Labels
14. Drawer Dividers
15. Flow Racks
16. Color-Coded Control Systems
17. Bar Codes
18. Shipping Labels
19. Directional/Wayfinding Signs
20. Dated Material
21. Informational Charts
22. Shipping/Receiving Dock Signs
23. Loading Dock
24. Office Hours
25. File Cabinets
26. Parking Slip Lots
27. Floor Labeling
28. Lean/5S Visual Workplace
In addition to Manufacturing and Warehousing, the LabelWorks team recommends possible applications in Education, Office, Building Management, Engineering, Labs/Healthcare, Maintenance, Quality Assurance, Energy, Utilities, IT/Datacom, Electrical and Construction.  Lots of possible uses in most every company.   And all for only $169 a printer.
Color Label Solutions is all about print on-demand color.  And now you can get durable color labels to use all across your organization.  Contact us to learn more or purchase one of these LabelWorks printers.
Guy Mikel
855-962-7670
C7500 Preventive Maintenance

After launching in 2014, Epson provided recently direction on how to conduct Preventive Maintenance on the C7500 and C7500G printers.

C7500 and C7500 Preventive Maintenance
Although we sold our first C7500 in February 2015, these preventive maintenance recommendations are new to me.  Here is a post converting our first customer using the C7500 label printer from February 2015:


https://colorlabelsondemand.blogspot.com/2015/02/first-of-many-ii.html

And a video covering their experiences.


According to Epson, the basic concept of the preventive maintenance on the C7500 printer is to remove accumulated paper dust; as paper dust is the largest cause of printhead clogs.  Printhead clogs may cause streaks/lines in your print output; and are designed to be eliminated by the automated maintenance of the printer.  I wrote about preventing plugged nozzles in 2015:


https://colorlabelsondemand.blogspot.com/2015/06/dust-label-printers.html

To check if you have printhead clogs, conduct an inkjet nozzle pattern test (in the Printer Setting Utility; Printhead Maintenance Section).

C7500 Nozzle Check Pattern
If you find a plugged nozzle, then conduct a manual cleaning from the menu on the front panel.
But according to Benjamin Franklin, “an ounce of prevention is worth a pound of cure”.
Epson recommends cleaning both the “Paper Loading Area” and the “Platen Area” using a damp cloth and a “neutral” detergent.  A neutral detergent is a mild soap with no alkalies or bleach; generally, with a PH of 7.  Do not us alcohol on these parts of the printer.
In the Paper Loading Area, Epson recommends to clean the media guide primarily.

C7500 Media Guide
C7500 Media Guide
 In the platen area, you should clean the area that is exposed when the front door is opened.


C7500 Platen Area
C7500 Platen Area
Specifically, be sure to clean up the gap sensor in the back of the platen area.

C7500 Gap Sensor
C7500 Gap Sensor
You want to clean up the paper dust, ink stains and glue residue from any of these areas.
In addition, Epson recommends using a small vacuum to remove any additional paper dust; especially underneath the spindle in the Paper Loading area.  Although Epson mentioned this recommendation secondarily, you may want to vacuum first before cleaning with damp cloth.  DO NOT use pressurized area anywhere inside the printer; and this may spread dust particles to more sensitive areas such as the printhead. 
After cleaning the platen and paper holding areas, Epson recommends cleaning the cutter as well.  The cutter has two parts; a stationary bottom blade and a movable top blade.  To clean/remove the adhesive on the fixed bottom blade, use a cotton swap and alcohol.

C7500 Bottom Cutter Blade
Users do not have access to the movable top blade.  If the cutter stops functioning, contact Epson Advance Tech Support or us.
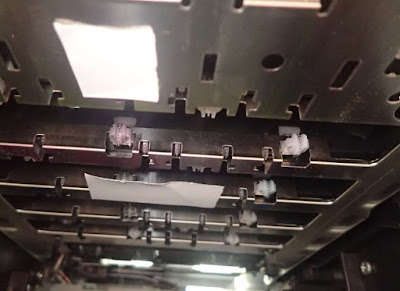
Although not considered “preventive maintenance”, it may be possible to get a label jammed inside the printer.  If have a label jammed inside the printer, remove it immediately.

C7500 Jammed Labels
C7500 Jammed Labels


In this picture, these stuck labels are obvious.  However, I’ve had labels get jammed up inside the printer in the area of the printhead.  And these were impossible to see; and caused printing errors similar to a plugged nozzle.  Be certain to check up inside the printer with a flashlight to look for labels that may be stuck above the platen area. If labels are stuck above the platen, contact Epson or us to arrange repair.
A C7500 is a big investment for most companies.  If you own a C7500, please follow these preventive maintenance procedures.  Conducting this preventative maintenance will help the performance of the printer; and the return on this investment.  

To purchase a C7500, C7500G, or any other color label printer, be sure to visit our store:

Or contact us if we can help with the purchase or preventative maintenance of a C7500 and C7500G printer.


Guy Mikel
855-962-7670
info@colorlabelsolutions.com 

Purpl Pro Potency Test

At the recent Cannabis Business Summit, Delta 9 Systems, https://www.delta9systems.com/the cannabis division of our parent company General Data, https://general-data.com/, launched Purpl Scientific’s Purpl Pro Instant Potency Measurement System.

https://purplscientific.com

Purpl Pro Potency Kit

Purle Pro is a hand-held solution that turns the user’s smartphone into a robust potency measurement system.  Using your smartphone and a hand-sized device, you get an immediate analysis of the potency of a cannabis sample. Purpl PRO provides a complete picture of both THC and CBD. And Purpl makes it really simple to get the precise information that is most important to you.
Based on near-infrared spectroscopy, a technology originally developed for agricultural measurements 70 years ago, the Purpl PRO is aimed at bringing this well-proven approach to the cannabis industry.  And the Purpl Pro is accurate; the target accuracy bounds of ± 2% up to 20% THC and ± 1% of the measured value above 20% THC.  To obtain a white paper on the technology, contact us.

Purpl Pro Potency Kit Components
To operate Purpl Pro:

  • Open the app on your smartphone
  • Click “Calibrate” on your smartphone
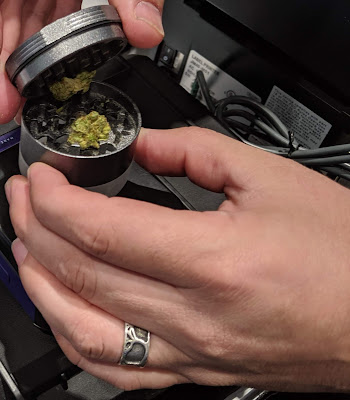
  • Prepare the sample and load into the chamber; using the chamber to grind up the sample.

Purpl Pro Flower Grinder
  • And then select “Measure” to get the results

Purpl Pro App
Purpl Pro App
And you get the results in seconds.  Chris Guthrie, General Manager of Delta 9 Systems measured a sample from an attendee at the Cannabis Business Summit:

Purpl Pro Test Results
According to Chris, “everyone we showed the Purpl Pro was excited by the results.  It works great and is easy to use. And doesn’t even destroy the samples.”
Chris continues, “I see 5 different use cases for the Purpl Pro:

  •     Plant Breeders; to establish potency of new offspring
  •     Phenotype Hunters; to select the plant with the most desirable traits in large seed hunts.
  •     Cultivators: to optimize growing operations and gain insight on ways changes made to programs and methods affect potency
  •     Brokers/Distributors; to verify consistency
  •     Manufacturers: to dial in precise dosages
  •     Home growers/consumers; to know what you are ingesting and how different methods affect crop to crop performance.

And in all of these cases, the Purpl Pro pays for itself if you save just a few potency tests; as the price of the unit is $1,495. Plus, Purpl Scientific plans updates soon to add other features to the firmware/software that will add even more value.”
To purchase, visit our store: 

If you see an opportunity to use the Purpl Pro in your operation, contact us. Lots of people will want this device!

Guy Mikel

855-962-7670

New QL-120 Offers

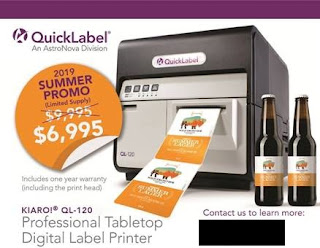
I’m pleased to announce a new product that we’re now selling; along with a price decrease.

QL-120 Price Decrease Announcement
QL-120 Price Decrease Announcement 


AstroNova just announced a price decrease on the QL-120; now $6,995.  This price change makes the QL-120 a very competitive label printer.  Let me tell you when I believe this printer may fit your operation.
First, I would recommend the QL-120 for printing all black artwork; especially on matte finished labels.

QL-120 Prints All Black
This printer uses a new dye-based ink, that typically produces more vibrant colors.  As black is the most difficult color to print well, the dye-based inks print black better. Therefore, if you have artwork that is mostly black, the QL-120 should work well for you.

In the past, I’ve recommended gloss poly labels for all black: 


Second, the QL-120 can print labels down to .5” wide; versus alternatives that have an official minimum print width of 2”.  Typically, we produce “Multiple Up” labels, 2 or 3 in a row to enable the production of narrow labels: such as discussed here: 


https://colorlabelsondemand.blogspot.com/2014/10/printing-narrow-color-labels.html

Or hear for printing 1” labels:


https://colorlabelsondemand.blogspot.com/2017/07/1-solution.html

The “multiple up” works well except when you use a label applicator.  In this situation, you need to print only a single column of labels.  With the QL-120, you can print and rewind very narrow labels to place on your label applicator. 
Third, the QL-120 can cut individual labels; or can be configured to cut at any interval of labels.  This cutting feature will help when you need to cut every individual label.  This cutting slows down the printer, but is still relatively fast compared to other label printers.  You can watch the QL-120 printer cut labels at the end of this video:


In the past, I’ve worried about the Kiaro printers given they have replaceable printheads.  The process and cost to replace printheads seemed onerous.  With the new QL-120, the process seems more straight-forward; watch this video to learn about replacing the printhead on the QL-120:


https://www.youtube.com/watch?v=7TB28OqYjA8&t=7s

QL-120 One Color Printhead
As for the cost to replace a QL-120 printhead, it’s still not inexpensive at $699.00 for one color.  However, AstroNova now guarantees the printhead for one year.  This guarantee combined with the seemingly easier process to replace the printhead makes the QL-120, a good option; especially when you need true black color, narrow labels and a cutter for every label as well as a label printer for less than $7,000.

To purchase the QL-120, visit our store:

https://colorlabelsolutions.com/product/kiaro-ql-120-professional-tabletop-digital-label-printer/

To purchase ink for the QL-120, visit our store here:

https://colorlabelsolutions.com/product-category/ink-cartridges/quicklabel-ql-120/

To purchase the QL-120 3-year Customer Support Package (includes up to one site visit (as needed).  Quickswap parts replacement Service, and unlimited telephone and email support) visit our store here:

https://colorlabelsolutions.com/product/kiaro-ql-120-customer-support-package-for-3-years/

QL-120 Color Label Printer

Contact us if we can help with you with QL-120. 
Guy Mikel
855-962-7670
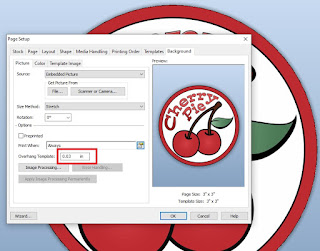
Cannabis Branding Battle Ahead

In the Forbes article titled, Cannabis Branding Battle Ahead, 

https://www.forbes.com/sites/paultalbot/2018/07/13/the-cannabis-branding-battle-ahead/#2eae30ac7857

The author opines, “where is the source of the Brand Value” as the main question around cannabis branding?  Newly introduced Fireball Cannabis Gummies, https://www.fireballcannabis.com/, has developed an outstanding marketing strategy, that includes packaging and labeling from Color Label Solutions.


Fireball Cannabis Gummies
Let me tell you about the work Fireball Cannabis did to bring this exciting new brand to market; and our work with them.
Some time ago, Kevin Forde and Mike Sandrin of Fireball Cannabis, contacted us about our containers, MPACKS.  MPACKS are the first new pharmacy vial since the 50’s.  This package is child resistant and tamper evident as well as offers 5X more label real estate than the traditional vial.  According to Mike Sandrin, “we needed a tested and approved child resistant package for our gummies.  We found the MPACK was a good choice for our brand.”  In addition, Kevin Forde added, “the MPACKS travel well; and do not crush in pant pockets.  Plus the MPACK is almost water and air tight.”

MPACK Colors
MPACK Colors
In the past, I’ve written about our MPACK package for cannabis.  You may remember this post covering District Edibles and their use of the MPACK.


Based on the benefits, Mike, Kevin and the team at Fireball Brand selected the Silver MPACK for their package.  The silver color worked well with the Fireball brand.  
Once the MPACK was selected, we then turned our attention to labels.  To label the MPACK, we suggested two options: 1, 8” label that wrapped the entire package and included the test data.  Or 2 labels, one 6.38” brand label and a 1.5” secondary white label for the test data.  Both options include a perforation to act as a “tamper evident” seal.

Fireball Gummies Label Artwork
To create the label artwork, Mike and his graphic artist created several iterations to create the best possible look and feel.  As the brand label had only 1 version, Fireball Cannabis decided to purchase preprinted labels. To make sure the colors and text were correct, we produced “press proofs for Fireball Cannabis to approve.
And I just happened to be in the plant when we were slitting and rewinding the labels after production.


For the secondary, lab test data, we recommended a traditional thermal transfer printer to produce the black only text.
When asked, what was the most difficult part of bringing the Fireball brand to market, Mike said, “the blister packs.  We purchased a custom machine and had to tune the viscosity of the materials in order to fill the blister packs correctly.  This process took time and a lot of work.”

Fireball Blister Packs
As I’m not from the packaging world, I can only imagine the work this process took; and the risk involved to get the packaging correct.

After getting the blister packs and MPACKS, Fireball Cannabis had to apply labels; correctly.  With the requirement to place the label perforation correctly over the seam between the top and bottom of the MPACK, they elect to use a Take-A-Label applicator with a custom-made jig to hold the package in place. The affordable label applicator insures the labels are placed in the correct position every time.  Watch the operator use this applicator to apply the labels:


With the product ready, Fireball launched their gummies, to great success.  At a recent Fireball Pop-Up event (find an event near you here):


Fireball Gummies Pop Up Event

I asked Kevin about the success of the launch. “We’ve had great success with our gummies, both in terms of sales and market share. Instead of large-scale advertising, we’re spending our time in dispensaries like this pop-up event today, demonstrating to Budtenders, how to sale our product.  Our brand ambassadors work with budtenders to recommend and sell the gummies.  So far, this training strategy has worked well”.

Fireball Gummies Marketing Efforts

In the article “Cannabis Branding Battle Ahead”, the author states, “Many of the branding tenets and practices that have served marketing savvy brewers, distillers, and vintners so well will take root in the cannabis industry.”  The success of Fireball Cannabis demonstrates this statement as very true.
As for next steps, Mike says, “we’re currently working to launch our product into several new states.  California, Michigan and several other states are in our plans”.
I believe that Fireball Cannabis has done an outstanding job not only with the branding, but also with getting this complex product to market.  I admire their work; and their efforts to make this brand a success.  Given the success of their brand, as well as their product and marketing strategies, I had hoped to nominate them for the MJBIZDAILY’s Cannabis Industry awards:   


But alas, I can’t as I don’t have the confidential data to submit the application. So please visit the Fireball Cannabis website or purchase their gummies the next time you visit a Nevada Dispensary to show your support for their branding and marketing efforts.
If you need labeling and branding support, contact Color Label Solutions.  We’ll help you build your brands as well.
Guy Mikel
855-962-7670
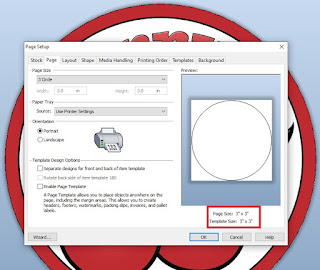
info@colorlabelsolutions.com