Consumer Vs Label Printers

In this post, we have a guest blogger:  Hannah Gibson.  Hanna is a great new employee for Color Label Solutions; we’re lucky to have her on our staff.  Read Hanna’s first post next.

My name is Hannah Gibson, a Sales Manager for Color Label Solutions, based in the Seattle area. After working at a label convertor, I came to work at Color Label Solutions to manage label sales. In my conversations with different companies in different industries, I hear frequently “I don’t know anything about label printing”. To me, this situation is great as our mission is to support companies transition to On-Demand Color Label printing.
One question, that I get asked frequently when speaking to newer or smaller companies is “Why should I use a label printer?  I’d rather print from my office/home printer.”
When responding to this question, I provide several reasons why a label printer is a much more efficient choice for any company.


Sheet Vs Roll Labels

Let’s start with cost per label, which is a big factor for businesses. I Googled the top selling printer of 2018, which I found was an HP OfficeJet printer, according to Amazon.


HP: Highest Selling Consumer Printer

For the HP OfficeJet printer, the yield is 165 pages/tri color cartridge. The cost of a black and tri color cartridge is $42.89. $42.89 divided by 165 is $0.26/page. With 10 labels per sheet, the ink cost per label is $0.026. Assuming the 165 page/cartridge yield was calculated at 15% coverage, the cost per label would be $0.13/label when printing at 80% coverage; 5-fold more.
To learn more about how these ink yields are calculated, read this previous post:


After calculating the ink, I calculated the cost per an actual label.  For this comparison, I used a 4” x 2” Matte Poly sheet label from Avery.


https://www.avery.com/products/labels/5523

and calculated a cost per actual label of $0.11. Therefore, the ink and a 4 x 2” label combined would cost approximately $0.24.

C7500 Ink Cartridges
When printing a 4 x2” label with approximately 80% ink coverage using the Epson C7500G, I calculated the ink cost at $0.017/label.  A 4” x 2” Matte poly Label we sell on a roll is $0.042/label, with significant discounts in volume. 


https://colorlabelsolutions.com/product/4-x-2-matte-poly-labels-3-core-c7500/

Overall, I calculated the cost for ink and material in a consumer printer is at least 24 cents (assuming 80% coverage).  At the same time, the cost for ink and labels using an Epson label printer are less than 6 cents; a savings of 75%.


Sheet Labels
Sheet Labels

In addition to ink and label costs, add the extra waste. Most companies I talk to who are wanting to transition from sheet fed to labels on a roll mention they experience lots of jams, and have a hard time getting the print to line up on the labels, resulting in a lot of waste.  And what if you wanted to print only 4 labels at any one time?  You could waste up to 6 labels.

Another important factor is a printer designed for labels will increase your productivity. The simplest explanation of increase in productivity with a label printer is speed; a label printer is generally faster than your office printer. In addition, your employees will waste less time fixing jams or selecting which labels on a sheet to print. When needing a few labels, you can print the exact number rather than a full sheet of maybe 4-16 labels at time.  Also, rolls of labels enable you to use a label applicator or dispenser to automate more of the process.

Also, label printers give you flexibility in design and automation. With a label printer, graphic designers will have flexibility to create a more professional looking label, which is important for branding. Also, label printers enable the use of label design software such as BarTender, which allow for automating Variable Data printing. 
Besides cost, waste, productivity and design, label printers offer a HUGE difference in durability when compared to a consumer-oriented printer. By most accounts, a typical consumer printer should last 1 to 3 years. But when adding sheets of labels that are oozing adhesives, the printer typically wont hold up very long. A label printer is built for manufacturing environments and will last much longer with heavy use.
As the premier provider for Print on Demand systems, Color Label Solutions can help you transition to printing high resolution, durable labels with a low cost per label. Give us a call today to talk about your label requirements. 


C7500 With Rewind
C7500 With Rewind

Hannah Gibson
info@colorlabelsolutions.com
855-962-7670

Purchase a C7500 here:
https://colorlabelsolutions.com/product/c7500-inkjet-label-printer/ 

Making Money On-Demand

Recently, I attended a webinar by HP titled, “Cost vs Value; how to monetize digitally printed packaging”.  In this webinar I found HP lays out the reasons for Color Label Solutions to exist: by explaining the benefits and returns for moving to on-demand color labels and packages. 


In addition, HP provides a ROI tool to calculate the potential return on investment for moving to on-demand color, or in their terms, “Packaging Decoration”.  In this post, I’ll summarize the paper; and provide links to download the whitepaper and get the calculator.
Overall, HP states that on-demand color packaging and labeling has 3 key advantages when compared to preprinted:

  • No Plates
  • No Press Setup
  • Easy configuration

These advantages lead to the benefits:
  • More cost-effective printing of small batches
  • Increased agility; by reducing the time to market
  • Increased variation and personalization of labels and packages, in which every item is “one-off”.

The benefits of on-demand color increase the value to the company, both internal and external to customers.  But where does a company find the value to pay for the typical cost per unit increase in using on-demand color labels and packages?
HP offers 4 areas to research inside a company to find returns from moving to on-demand:
  1. Supply Chain- Adding efficiencies
  2. Marketing-Extending customer engagement
  3. Finance-Increasing overall profitability
  4. Business Development-Developing/Testing new market opportunities

#1: In the Supply Chain, HP states moving to on-demand:
  • Reduces warehousing
  • Frees up capital trapped in inventory
  • Allows for fewer materials to be ordered
  • Reduces obsolesces of artwork changes
On-Demand saves money throughout the supply chain.


#2: In Marketing, HP opines that on-demand labels and packages are the final opportunity to convince customers to purchase their products.  In addition, on-demand color labels and packages enable companies to strengthen brands making it easy to set up product versions and localized promotions.  And finally, on-demand color enables brands to invest in promotions and advertising for less than traditional methods.


#3: In Finance, HP says on-demand color offers ways to increase sales and margins; a means to increase overall profitability.  By understanding the ratio of gross dollar margin divided by the current cost of “decorating” (the incremental cost of on-demand) labels and packages, companies can calculate the value or return in the investment.  For most companies, HP says the increased sales required to pay for the increased cost of on-demand is less than 1%.

#4: In Business Development, HP states that on-demand makes it easy to develop:
  • New consumer categories
  • New channels
  • New territories
  • Test markets, special programs, regional customization and tactical e-commerce activities

On-demand enables companies to customize product packaging and labels which is different than traditional channels; making testing of new offers easy to do with limited impact on existing paths to market.

For further information, download this white paper here: http://www8.hp.com/h20195/v2/GetPDF.aspx/4AA7-2182EEW.pdf 


In the companion RODPI (Return on Packaging Decoration Investments) Excel sheet, HP gives companies the methods to calculate their return on investment in moving to on-demand.  Email HP here, ropdi@hp.comto get this ROI calculator. 
After reviewing this white paper and calculator, I believe current customers of on-demand color tools can find ideas on how to increase their return on this investment.  Further, this white paper gives non-users ideas on how on-demand color labels and packaging will make money for their companies.
With the changes in technologies, on-demand color labels and packages make financial sense for many if not most every company.  Contact us to discuss how on-demand solutions we sell will help your company increase returns and support your areas for growth.

Guy Mikel
855-962-7670

July 1st: Are You Ready?

It’s July 1st: Are You Ready?
On July 1, 2018, California’s new regulations governing the packaging and licensing of cannabis begins.
CBPH Issued Universal Cannabis Symbol
Although we’re not regulatory experts, we can help with compliance to the packaging and labeling requirements coming to California.  And recently, we’ve had a lot of questions from our customers on these issues.  Let me tell you more about the requirements as we understand them; and how we can help.
First; Child Resistant Packaging is required for all cannabis packaging.  If you need a child resistant package, we offer the MPACK; the first new pharmacy vial since the 50’s. 

18 and 30 Dram MPACK's
18 and 30 Dram MPACK’s
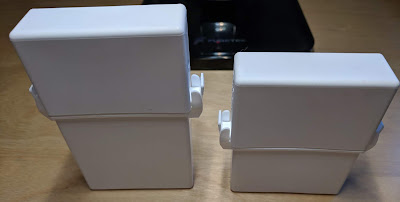
 Plus, we have them available in two sizes; 18 dram (3.125” tall x.92” wide) and 30 dram (4” tall x .92” wide).

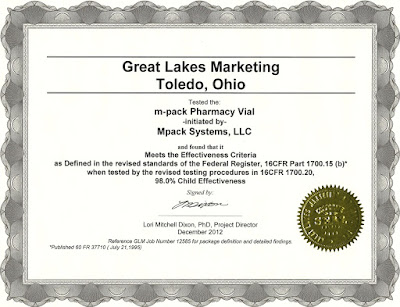
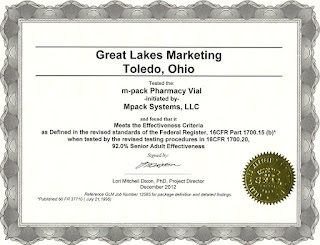
And most importantly, these packages are certified child resistant:

MPACK Child Resistant Certification

Second to Child Resistant, packaging must be tamper evident.  With the MPACK, we recommend labeling over the top/bottom sections where the packaging separates.

Labeled MPACKS
Labeled MPACKS
With the addition of a perforation, separation of the label between the top and bottom is easy to do. 

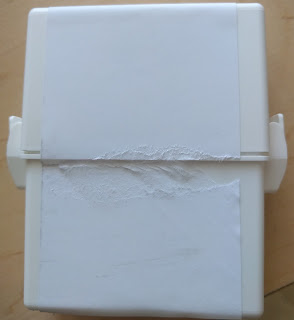
Tamper Evident Paper Label
For other types of packages, we have paper labels with a durable adhesive that acts as a tamper evident seal.  Once the adhesive is set, the paper can’t be removed (on most surfaces) without shredding.  If interested, we can send you matte paper labels to test on your packaging.

MPACK's In Color
MPACK’s In Color

Third, packages for edibles must be opaque. As seen in the above picture, we have the MPACKS in a variety of colors, with the option of a monochrome image on the package itself. 
Fourth, packages must be resealable; the child resistant “Snaps” on the sides make the MPACK resealable. 


Resealable MPACK
Resealable MPACK

Even with the side snaps, the MPACKS are so easy to open they qualify as Senior Friendly!

MPACK Senior Certification
In addition to the packaging requirements, California has new labeling requirements; both on the “Primary Panel” label and the “Informational Panel” label. On the Primary panel, the label must:

  • Identify the product
  • Provide the THC/CBD content
  • Contain the CBPH Issued Universal Cannabis Symbol
  • Include net weight or volume.
On the Information panel, the label must contain:
  • Manufacturer’s name/contact information (website/phone number)
  • Manufacture date
  • Government warning statement
  • Ingredient list
  • Instructions for use
  • Expiration date
  • Unique ID/Batch number

(FYI: I found this page helpful.  https://www.cdph.ca.gov/Programs/CEH/DFDCS/MCSB/Pages/PackagingandLabelingFAQs.aspx )

As for the warning statement, I found this paragraph:
“GOVERNMENT WARNING: THIS PRODUCT CONTAINS CANNABIS, A SCHEDULE I CONTROLLED SUBSTANCE. KEEP OUT OF REACH OF CHILDREN AND ANIMALS. CANNABIS PRODUCTS MAY ONLY BE POSSESSED OR CONSUMED BY PERSONS 21 YEARS OF AGE OR OLDER UNLESS THE PERSON IS A QUALIFIED PATIENT. THE INTOXICATING EFFECTS OF CANNABIS PRODUCTS MAY BE DELAYED UP TO TWO HOURS. CANNABIS USE WHILE PREGNANT OR BREASTFEEDING MAY BE HARMFUL. CONSUMPTION OF CANNABIS PRODUCTS IMPAIRS YOUR ABILITY TO DRIVE AND OPERATE MACHINERY. PLEASE USE EXTREME CAUTION.”
For edible products, the label must contain any allergen information, list of artificial food colors, and nutritional information.

If you decide that your labels need to meet Prop 65 requirements, please see this earlier post:  http://colorlabelsondemand.blogspot.com/2017/09/new-ca-prop-65-requirements.html

To print the Unique ID, Batch Number, Expiration date, THC content, CBD content, and all other variable data, we recommend BarTender; the leading label design and printing software.  With this software, it’s easy to add information to an established label template at print time or integrate with a database as simple as Excel to pull variable data onto a printed label.
If interested in BarTender, here is the link for a free 30-day trial download.

 And to start, I suggest you watch these three short videos:


Purchase BarTender and software maintenance here:  https://colorlabelsolutions.com/product-category/label-software/

Overall, we have a child-resistant package, tamper evident labels and software to make printing variable data easy to do.  Plus, we’ll help you design and print the labels you want to use on-demand and in color.  Contact us if we can help you with your new California labels.
Guy Mikel
855-962-7670

By Fabricators, For Fabricators

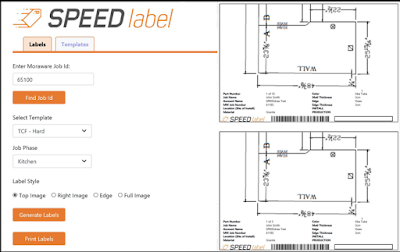
“By countertop fabricators for countertop fabricators” is the tagline for Fifth Gear Technologies, who develops software applications for the countertop market. Initially, Fifth Gear Tech launched SpeedDraw,  http://speeddraw.net/a CAD-based software to help fabricators produce final drawings, job tickets, and quality control documents faster with fewer mistakes at less cost.  Following SpeedDraw, Fifth Gear Tech launched SpeedLabel, https://speedlabel.net/the first tracking application for the countertop industry.


SpeedLabel Interface

According to Steve Mast, Partner in Fifth Gear Technologies, “SpeedLabel is designed to track custom parts as they travel through the production process.  As these parts are custom, mistakes, either in production, delivery or installation, cost a lot of money.  The objective of SpeedLabel is to help our fabricator customers improve their overall operations and save money by tracking the custom pieces as they travel through production, delivery and installation.”

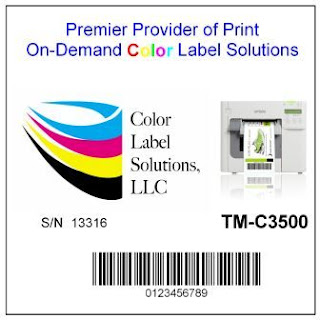
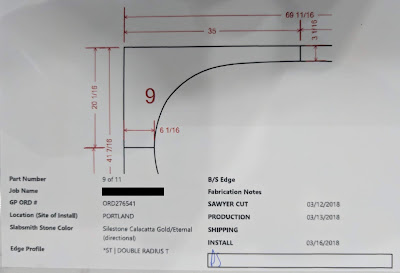
Printed Label from the C3500 Using SpeedLabel
Printed Label from the C3500 using SpeedLabel


When asked about the use of the C3500 to print labels, Steve says “we use both color and images on our labels.  Images communicates the dimensions of the individual custom pieces.  Color profiles or describes the edge element of the piece.  Together, color and images communicate to the operators in the plant and the installers how the piece should be manufactured and installed”.  Continuing, Steve says, “and we’re now building into our application color codes to highlight pieces within a specific order.  We’ve already had this request from several of our initial customers.”

Printed Label C3500 SpeedLabel
Printed Label from the C3500 using SpeedLabel

One key benefit of SpeedLabel is the ability to track custom produced items.  According to Steve, “normally, most fabricators rely on workorders/travelers that move through the plant and out on delivery.  With the labels printed from SpeedLabel, fabricators can eliminate work orders/travelers over time to simplify processes and reduce the opportunity for errors.”

C3500 Printed Tracking Label SpeedLabel
C3500 Printed Tracking Label from SpeedLabel

Another important aspect of SpeedLabel is the fact that Fifth Gear Tech designed the application to print from Google Chrome and Microsoft Edge.  From my perspective, browser-based printing is very unique in the label market.  Steve says, “Given the fact that we decided to use only the C3500 printer, configuring the browsers to print was relatively easy.  With browsers, any Windows based computer can print with no requirement to run a separate application.”
To learn more about Fifth Gear Tech and their applications SpeedDraw and SpeedLabel, check out this recent story in Slippery Rock, the most widely read stones trade publication: http://www.slipperyrockgazette.net/index.cfm/pageId/3116
From my perspective, I find SpeedLabel a great application, taking and using the capabilities of the C3500 to improve countertop fabricators operations.  Color and images combined with great programming improve their customer’s business.  Any manufacturer of custom items should consider this type of application to track and communicate the specific of each piece. Be sure to contact us if we can support your efforts in using color and images in your operation.
Guy Mikel
855-962-7670

NS Multi Prints New Materials

Print quality has been one of the important attributes of the NS Multi:

Grant Lapke With The NS Multi
In fact, I’ve written about the great print quality of the NS Multi in the past.  Once in our blog when we installed the NS Multi after WestPack:


And as well after PackExpo East:


This week, we tested two new materials that produced outstanding print quality.  Let me tell you about them.

First, we tested inkjet coated corrugated produced by one of our customers.  We loaded our inkjet coating into a press instead of the normal ink:

Inkjet Coating
Inkjet Coating
Ran it through a press:

Press Applying Inkjet Coating
And produced inkjet coated corrugated on a variety of types of materials.  Frankly, we were surprised by the array of materials we could coat at one time.

Inkjet Coating Corrugated From A Press
On the coated board, you could barely see the inkjet coating.  According to Grant Lapke, our NS Multi Specialist, “This coated material was not sticky and had more of a matte finish.  After printing, I say the colors “POPPED” more, producing more vibrant images.  In addition, it seems the coating makes the boxes more durable; a little less “flimsy” than non-coated boxes.  And the boxes seemed to withstand water slightly better”.

Inkjet Coated Corrugated Printed with NS Multi
And a video:


Second and in addition to the inkjet coated materials, we test printed plastic corrugated using the NS Multi.  Here is more information on this material:


https://en.wikipedia.org/wiki/Corrugated_plastic

With this material, we produced outstanding print quality on both sides without any coating:


Plastic Corrugated Printed with the NS Multi

And a video:


and this video:


According to Grant, “the printed, plastic corrugated produced outstanding print quality.  As the surface of the plastic corrugated is smooth, the print output comes out very nice.  This material should work well for signs, merchandizing displays and boxes.  As the NS Multi can print up to 12 inches per second, the speed of the printing signs and displays would be significantly faster than a flat-bed printer”.

Grant continues, “both the inkjet coated and plastic corrugated print great. Which material is best depends on the application and the value of the box, sign or merchandizing display.  It’s great to know we can print both with the NS Multi.”
If you need to print boxes, signs and displays on-demand and in color, contact us.  We’ll help you get started in this exciting, new market.
Guy Mikel
855-962-7670

Inkjet Coated Kraft

All the time, we get requests for Kraft paper labels. 

However, I’ve found these Kraft labels to print poorly with inkjet printers.  The primary reason for poor print quality is that the ink will migrate/spread on plain paper.  This migration or spread makes the print quality look “fuzzy” and frankly, not good.  Wish I had a closeup picture; so hopefully you can imagine what I mean.
Almost all of the labels we sell have an inkjet coating.  This coating adheres the ink to the surface of the label, preventing the ink from migrating/spreading; and making the ink bind to the paper stronger.  For example, inkjet coating enables us to sell durable, poly labels that meet the BS5609 requirements.  To meet the requirements for the marine shipment of chemicals, printed labels must survive in the ocean and resist server abrasion testing.  Learn more about BS5609 from these older posts here: 

Now we have just launched a new inkjet coated Kraft paper label that prints great!

Inkjet Coated Kraft Paper Labels
When we received the new inkjet coated Kraft paper, we printed the material using a relatively low-resolution artwork. 
C3500 Printed Inkjet Coated Kraft Labels
And compared it to our standard matte paper:
Matte Paper vs Inkjet Coated Kraft Paper Labels
From our print tests, we found the print quality of the new inkjet coated material much better than traditional Kraft paper labels and almost as good as our standard matte paper labels.
Once tested, we sold it almost immediately to a customer, Kristy of Blue Rock Acres. 

http://bluerockacres.com/

When asked why Blue Rock Acres was interested in a Kraft paper label, Kristy said, “The company was looking for a label that would distinguish our A and B Brands. We went with Kraft-backed packaging for the new B brand and thought the look should carry over to the label as well. We wanted a brown bag appearance, a wholesale or low-price vibe, while still being eye catching to the consumer. I think the Kraft labels capture this extremely well and I am very pleased with the new labels.”

Blue Rock Acres Printed Labels
Considering these labels were printed with a relatively low-resolution C3500 printer, I think they look great!  According to Kristy, “The new Kraft labels look great and print great, including small print disclaimers and barcodes! Just the look we wanted.”
If you are looking for vintage or brown paper look for your labels, consider our new inkjet coated Kraft paper.  You’ll find these labels print great; and convey the desired brand image.
Guy Mikel
855-962-7670

ZPL With The C7500

Recently, I had reason to practice printing ZPL to a C7500.

ZPL Datastream Printed With The C7500
Let me tell you more about to use this capability in the Epson C7500 printer.

Before I begin, you may be asking what is ZPL?  Zebra Programming Language (ZPL) is the command language used by all ZPL compatible printers. It is a command-based language used by the printer as instructions for creating the images printed on the labels.  Although I can’t find the history of ZPL, Zebra Technologies changed it’s name in 1982 to focus on thermal transfer printers; and was probably using a version of this language at that time: https://en.wikipedia.org/wiki/Zebra_Technologies.   Sato claims to have invented thermal transfer technology with the launch in 1981:  https://en.wikipedia.org/wiki/Thermal-transfer_printing.  Before Windows, desktop printers used a print language.  And many of Zebra’s competitors offer ZPL emulations or interpreters.
From my perspective, ZPL offers a few key benefits; primarily speed and legacy installed base.  With ZPL, the application sends only the variable data to the printer; making time to first print very fast.  By using a preprinted label or uploading a template, you can embed non-variable objects onto the label.  In addition, developers have created applications for decades that use ZPL to print; and Zebra has sold millions of printers to customers who use these applications.
To print a Zebra ZPL print stream using the C7500, you have two options:
  • Use a Generic Text Driver
  • Use LPR from a command line

To use a Generic Text Driver, you need to add it to your system.  I found the instructions here on how to add this driver: https://dfarq.homeip.net/how-to-add-a-generic-printer-in-windows-10/


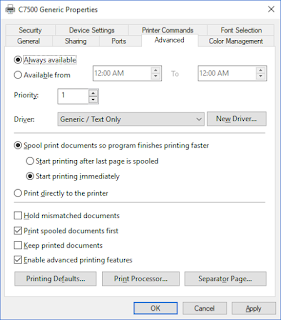
Once added, you need to select it to replace the standard C7500 driver on the Advance Tab.
Generic Text Replacing C7500 Driver
Once the driver is installed, you need to change the resolution of the printer.  For the ZPL print stream I had, I needed to change the Resolution in “Printer Setup 1” to 200 dpi.  To make this change, go to Menu on the front panel, page down to select “Printer Setup 1”, page down to select “Resolution”, and then use the arrow keys to select 200 DPI.  Be sure to remember to change this setting back to 600 dpi when finished as well as select C7500 on the Advanced tab in the Driver setting.
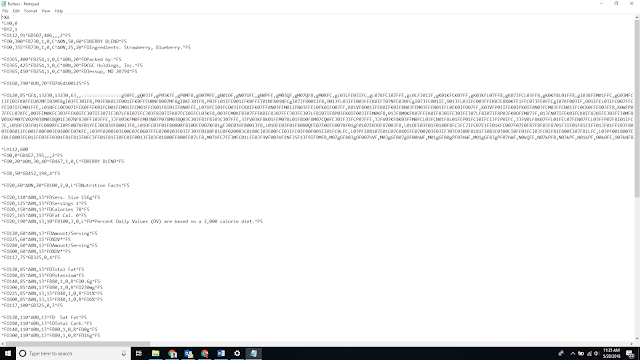
To print the ZPL stream, I then opened the ZPL code in Notepad:

ZPL Printstream in Notepad
And printed to the C7500 using the Generic Text Driver.  Worked perfectly.

ZPL Printed Using The C7500

To print using LPR, I found this page seemingly straight forward on how to use this capability:  https://www.cups.org/doc/options.html.  (Full Disclosure:  I never actually used this method to print).  Experts with Linux should find these instructions easy to follow.

Actually, printing the ZPL is the easy part.  I found the uploading and creating the correct image template much more difficult; but figured it out.

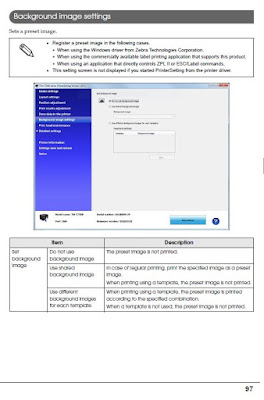
On page 98 of the C7500 Operators Manual, you’ll find the instructions on how to select a background image to print.  Get the manual here:   https://files.support.epson.com/docid/other/m00079108.pdf


C7500 Background Image Settings


One key aspect I missed was the last sentence in the initial paragraph: “This setting screen is not displayed if you started the Printer Setting Utility from the printer driver”.  It took a call to Epson Advance Tech Support (562-276-1340) to figure out why I could not see the “Background Image Setting” option.  Once I understood, I downloaded and installed the printer setting utility as a separate application.  You can download this utility here:  https://download.epson-biz.com/modules/colorworks/index.php?page=single_soft&cid=346&pcat=35&pid=5.

Once installed as a separate application, I could select the “Use Shared Background Image”.
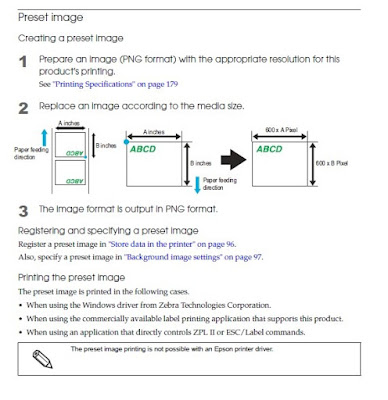
To create your background image, follow the instructions on page 99 of the C7500 Operators Manual:

How To Create Preset Image To Upload To A C7500

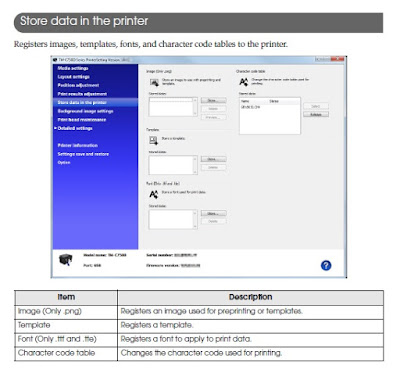
Key aspects are 1, must be a PNG format.  And 2, you need to create the image using the correct X/Y settings based on the label media size you are printing.  Once you have the correct image created, you can upload it following the instructions on page 98.

Upload Background Image To C7500

Once uploaded, the image prints in color whereas the ZPL code is printed black:

Color Image on ZPL Printed With The C7500


(FYI: I did not take the time to fix the image as the correct size or location.   But it printed!)

Over the years, I had several individuals talk about the ZPL feature of the C7500.  But I never had a company put this feature into operation until now.  With legacy applications, the ability to print native ZPL is an interesting feature of the C7500; especially with the ability to upload images completely eliminating the need to purchase preprinted labels.
If you are interested in using ZPL, contact us.  We’ll help you get started printing quickly.
Guy Mikel
855-962-7670

Get Your Matrix On

Printing full-bleed correctly can be tricky using die cut labels. 

Full-Bleed Label Printing
The problem is you want the ink to cover the edge of the label but not put too much ink on the exposed liner.  If ink goes onto the liner, you can transfer it to the actual label during application or rewinding.  Or you can’t quite get the label printed without leaving some white on the label.

Full-Bleed Label
Full-Bleed Label
 In the past, we’ve tried inkjet coated liners that work perfectly:  http://colorlabelsondemand.blogspot.com/2017/02/full-bleed-label-media.html

But are expensive to use.


And I’ve written about using a finishing system post printing.  Here is one option I saw at Label Expo:

Using a label finishing system is great if you are willing to invest in the equipment and change your process to print and then finish (laminate, die cut, weed the matrix and rewind) the labels.  Many companies don’t want to take the time or effort to complete this process.  But a finishing system produces prefect laminated, die cut labels each time.
One last option to produce full-bleed labels involves using slightly different die cut labels; leaving the matrix on.

Matrix On Circle Labels

In the above picture, you’ll see die cut circle labels; but you’ll also see the matrix left on around the die cut forming a rectangle and gap between labels.  With the matrix left on, you can print beyond the die cut label without having to working about the ink transferring.  Works great to produce full-bleed die cut labels.
However, you can’t use labels with the matrix on for label applicators; they will not peel correctly with the matrix left on.  And I’ve been told that labels with the matrix on are more difficult to peel and apply by hand.

To make matrix on labels easier to apply and work with label applicators, DPR has launched an inline matrix remover integrated with the C7500.  Watch this new device work here: 
https://www.youtube.com/watch?time_continue=47&v=cIt4yoOYNQE 

And learn more about this system here:  
https://www.dpr-llc.com/en/label-unwinder-rewinder-epson-C7500.html

Now in one step, you can print full-bleed labels completely; and then remove the matrix to have finished die cut labels.  If you have full-bleed artwork and use an applicator/find it difficult to peel and apply labels by hand, the DPR C7500 in-line matrix remover may work for you.  Contact us to learn more and discuss how this new device may make your workflow more productive.
Guy Mikel
855-962-7670

info@colorlabelsolutions.com 

Pack Expo East 2018

Last week, we exhibited at Pack Expo East  https://www.packexpointernational.com/ in Philadelphia, PA:

Color Label Solutions at Pack Expo East

Although not everything went as planned (inbound shipping was a nightmare), we still had a great experience talking to more than 130 people about print on-demand color labels and corrugated.  Here are 3 “Ah-Ha’s” I took from our experience.
First, our Sales Manager, Grant Lapke did an outstanding job installing, running and packing our NS Multi printer.  Although we shipped this machine a great distance, the print quality was still outstanding.

NS Multi Printed Box
Just look at this box printed with the NS Multi. Or our signs we printed as our backdrop arrived late to the show.


NS Multi Printed Sheet

I’ve written about the print quality before.  http://colorlabelsondemand.blogspot.com/2018/03/ns-multi-print-quality.html.   But given the shipping, I was impressed at how well Grant got this printer to produce outstanding quality. 
Given the print quality, we spoke to several companies about printing instore merchandizing displays.  The NS Multi would enable large, package good companies to produce personalized displays and end caps quickly.  And with the Caldera’s RIP capability for variable data and images, companies would be able to personalize each end cap uniquely for the store.  The capability of the NS Multi to produce unique and high-quality merchandizing is a new opportunity for us and the market.
Second, we launched a new semi-automatic label applicator integrated with the C7500.

Label Applicator Integrated with the C7500
This applicator uses a sensor and a movable arm to manage the “loose-loop” of labels between the printer and applicator.  You need this Loop given the fact the printer backs up when starting to print.  One feature I found of interest with this new applicator is that you can send a large (i.e. 500) print job to the printer.  As the labels are consumed, the sensor in the loop allows the printer to produce more, always keeping the loop filled.  So if you had a requirement of a batch of 500, you could print approximately 510-520 labels, and know when the batch was completed.  This feature may make this system work better for the operators.  If you are interested in applying labels to round and soon flat containers directly from the C7500, contact us.  We’ll discuss how you could use this new capability in your operation.
Third, we showed again the new L501 from Afinia; which produces beautiful labels.

L501 Printed Label
L501 Printed Label

And beginning May 1st, Afinia will start shipping this new product.  From my perspective, the L501 fits companies that need to print great looking labels in relatively small batches.  The cost of the printer is $3500; and offers both dye and pigment ink.  The “Due” Ink Technology aspect is interesting; as dye inks produce generally better colors whereas pigment inks are more durable typically.  If you want great looking labels but don’t want to spend a lot of money for hardware, the L501 may be a great option for you.
Pack Expo was a valuable tradeshow for us.  If you need great looking on-demand color labels, boxes or displays, contact us to discuss your requirements.  We’d appreciate the opportunity to learn more about your business.
Guy Mikel

855-962-7670

How Not To Kill Your Inkjet Label Printer.

Recently, Tim Semic, our Support Manager, suggested we create a blog on “how not to kill your inkjet label printer”.  I thought immediately, “that’s a great idea”.    Tim suggested the questions; and we both worked on the answers.  This post features answers based on our work with Epson label printers primarily; but the concept applies to label printers based on Memjet and HP as well.

OK, I don’t want to kill my label printer, tell me more.

The most common hardware problem with inkjet label printers are clogged nozzles. An inkjet printhead has thousands of very tiny nozzles. Memjet claims to have 70,400 nozzles in an 8.77” printhead: https://www.memjet.com/versapass/.  These nozzles are all subject to clogging; and thus, ruining your day.


What causes print nozzles to clog?

The number one reason inkjet nozzles clog is particles carried into the printer on the label media.  As this foreign material enters the printhead, nozzles can get plugged.  The second reason for clogged nozzles is similar to the first; dust and other foreign material in the air may plug inkjet nozzles as well.  The third way inkjet nozzles will clog occurs when the ink inside of the printhead dries. Dried ink inside the printhead may occur when leaving the printer powered off for long periods of time, and/or when the printer is kept in very dry environmental conditions.

What are the symptoms of clogged print nozzles?
A plugged nozzle symptom will manifest as white lines running across the label print output in the orientation of the printhead. These white lines are a classic symptom of clogged print nozzles. The lines that you see are actually the white label where no ink was applied. The other tell-tail symptom of clogged print nozzles is when your printer constantly goes into maintenance mode.


Clogged Inkjet Nozzle
The thin lines you see are from the label showing through due to clogged print nozzles.
My printer occasionally makes noise when idle and pauses often during printing. Epson Label Printers with an LCD display will show “maintenance” or “head maintenance”.

Your label printer has a service called Head Maintenance that runs periodically to keep the ink jet nozzles clear, and to prevent them from drying out. This maintenance service works by forcing a small amount of ink through the printer’s nozzles. However, this service may run repeatedly when clogged nozzles are detected. 
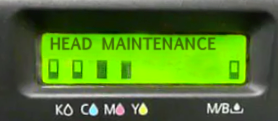
Head Maintenance
Head Maintenance

In the C7500, one option is to turn on the “spitting function”; also called “Continuous Printing”.
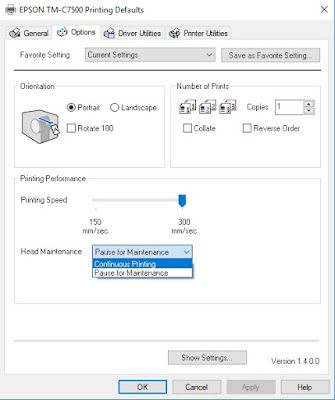
C7500 Continuous Printing

With this setting, the printer “spits” out very small quantities of ink, invisible to the naked eye, randomly throughout the print.  Memjet printers have the same functionality.  Sometimes the label may appear slightly grey from the ink, even though you can’t see the individual drops without a magnifying glass.  We recommend this setting if the tiny ink spots are OK with your print output.
The other option is “pause” for maintenance.  In this situation, the printer stops occasionally to check the printhead.
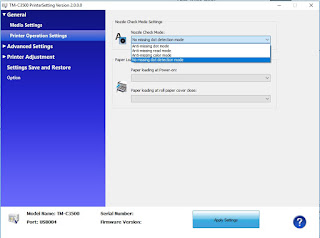
On the C3500, you can turn off the checking/cleaning function of the printer to save ink and to reduce the number of maintenance kits required.  As we print very few labels, we typically run our C3500 with the “no missing dot detection mode” selected; and then clean manually when needed.


What can I do if my printer is in a clogged nozzle condition?
Performing a manual cleaning is a way to take control of removing clogs in the nozzles. Prior to performing a manual cleaning, it’s best practice to print a nozzle check pattern from the printer utility software. A nozzle check pattern will provide you a baseline view of the problem. The nozzle check pattern prints lines of every CMYK color and will reveal areas and the color(s) that are being affected by the clogged nozzles.
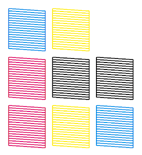
Nozzle check pattern

If you see gaps in the nozzle check pattern, the next step is to run a manual cleaning on the printer. After the cleaning cycle completes, you may want print out another nozzle check pattern to look for improvement.  You should repeat the cleaning/test pattern cycle until either the clogged nozzles have been cleared, or you no longer see improvement occurring.

The manual cleaning didn’t completely resolve the issue.  Now what?
Once you determine that the cleaning utility is unable to resolve the clogged nozzle condition, the printer will have to be repaired by the manufacturer in the case of Epson or any other manufacturer with permanent printheads.  For Memjet printers, you can also attempt to rehydrate the ink by placing the printhead in the shipping cap with distilled water.  If the nozzles remained plugged, you’ll need to replace the printhead.

How can clogged print nozzles be prevented in the first place?
The number one way to prevent nozzle plugging is to keep your label media in the plastic bags in which they shipped.  Keeping your labels in the bags reduces the likelihood of foreign material from entering the printer.

In addition, you should keep the work area with the printer relatively dust free.  Don’t run an inkjet printer in a dusty environment.
Also, it’s recommended that you keep the printer powered on at all times once you are printing regularly.  For example, Memjet recommends their printers run 24/7.  Also, don’t leave your printer powered off for a long period of time. Once powered off, the printer can no longer keep the nozzles from drying out.
When left powered on, the printer will not consume much electricity since as it switches into an Energy Saving Mode. While in energy saving mode, the printer will still perform a limited number of maintenance routines. 

Should I worry about “Dry Climates??
Whether hot or cold, dry climates will cause the ink in the print nozzles to dry at an increased rate. In conditions of low humidity below 20%, a humidifier may be placed near your printer, with the goal of keeping the proximate humidity above 20%.  Here are the general printer climate specifications: 

Temperature
Operating: 5 to 35°C {41 to 95°F}       Storage: -20 to 40°C {-4 to 104°F} (At 40°C {104°F}: up to 1 month) 
Humidity
Operating: 20 to 80% RH.                    Storage: 5 to 85%RH (No condensation)

With thousands of inkjet label printers sold and installed, we find these devices as the best current option; and we want to keep them working for you.  We hope you find these recommendations of value.  If you follow the above recommendations, you fewer problems, and have more uptime on your inkjet label printer.
Happy Printing!


Tim Semic/Guy Mikel
855-962-7670
Kiaro vs C7500G

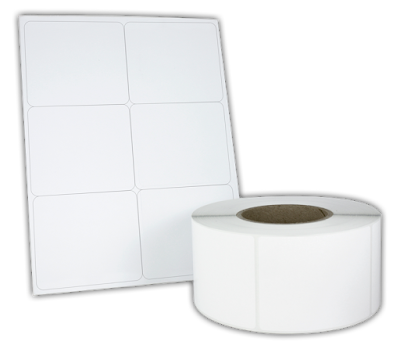
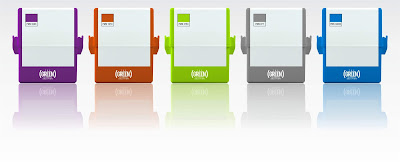
The Kiaro from Quick Label Systems, https://www.quicklabel.com/products/color-label-printers/commercial-label-printing/kiaro/,  has been one of the largest selling color label printers on the market.  Astro Nova has done a good job selling this printer.

Kiaro Label Printer
Kiaro Label Printer


I know this printer mostly from my work with current customers that have switched away from the Kiaro.  This week, I spoke with another prospect who had decided to purchase a C7500G.  Based on this discussion, I decided to try to describe the important differences between the Kiaro (and the other options sold under different names) and the C7500G. 

Before starting, please know that the Kiaro is the exact same printer as the Swiftcolor SCL 4000 D/P sold by Kanematsu. https://www.swiftcolor.com/SCL-4000DP.php

SwiftColor 4000
SwiftColor 4000

Many years ago I wrote about the Swiftcolor printer in this post:  http://colorlabelsondemand.blogspot.com/2013/08/short-run-in-plant-batch-label-printing.html 

In addition to the Kiaro and Swiftcolor printers, Canon announced the launch of the same printer, the D5500, in North America at CES:   https://downloads.canon.com/nw/printer/products/printers-and-multifunction/card-label-printers/ij-label-printers/lx-d5500/specifications/lx-d5500_specification_sheet.pdf

Canon Label Printer
Canon Label Printer
Now you have access to purchase the same printer from three different companies. In this post, I’ll use the brand name, Kiaro to represent all of the options.  And please remember; we don’t sell the Kiaro printer.  .
Looking at the Kiaro, I see 4 unique benefits vs the C7500G. First, the Kiaro offers up to 1200 x 1200 dpi print resolution; much higher than the C7500G with 1,200 x 600 resolution. I’ve seen great print quality from the Kiaro printer.
Second, the Kiaro comes in either dye or pigment-based inks.  Die ink are much more vibrant; but are not water resistant or water proof.  The ink will come off labels easily.  Pigment inks are very durable; but are not as vibrant in color as the dye Kiaro models.  But the choice is good to have depending on your requirements.
Kiaro Label Printer with Winders

Third, the minimum width of a 4” version of the Kiaro printer is 25 mm or .984”; which is narrower than the C7500G at 2”.  And the minimum length of a label is 6 mm or .236”; much shorter than the 1” minimum of the C7500G.  Narrow widths and shorter lengths make the Kiaro printer fit many more applications.

Fourth, the Kiaro offers an optional cutter.  For tag application in apparel or greenhouse, this cutter is a unique capability.  At the 2017 WestPack, I saw the Swiftcolor printer with a cutter in action.  Read about the cutter for tags in this post:  http://colorlabelsondemand.blogspot.com/2017/02/westpack-2017.html.  The cutter with the C7500G is not designed to cut each label; rather to cut at the end of a print job.


Although the Kiaro has other features, I don’t see them as unique or valuable in the comparison with the C7500G.
As for the negatives, I see 3 with the Kiaro printer.  The first and largest is the 4 consumable print heads.  As each printhead may cost up to $750, it is expensive to replace this consumable item.  As I understand, the costs are $2500 to replace all 4 print heads at once.
How long one of the four printheads last depends on the material and percentage coverage of the labels printed.  Many years ago, I requested an inkcost and printhead estimate on this 4 x 3” label:

4
4″ x 3″ Color Label Test Sample
And I was sent this estimate:

SwiftColor Yield Estimate


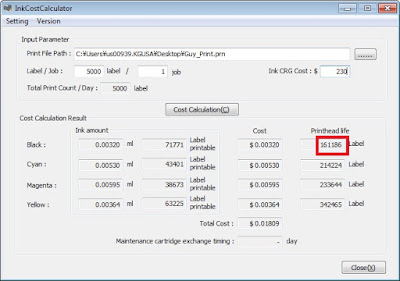
Although my request was concerning ink cost, the printhead life was more interesting to me.  At 161,186 4” x 3 labels, the printhead cost per label was 483,000 inches and added $0.0046/label; almost ½ of a penny per label for just the black printhead.  If you add up the cost of all 4 printhead, the cost per label was $0.013 just for printheads (assuming $750/printhead).  At the time, I was told the black line around the label reduced the black printhead life.  In this example, the printhead cost was almost as much as the ink cost/label. (Remember; these costs were from many years ago.  The printhead price may have changed).

In addition to the cost of the consumable printhead, installation of one of the four printheads is not so easy.  To replace the printhead, you need to drain the ink, disassemble the printer and remove 1 of 4 printheads, reassemble the printer and then recharge the ink.  In this video, Quick Label Systems assumes you want to change all 4 printheads at one time.


However, most people will want to change only the affected printhead.  You’ll need to remove and replace the printhead from the array.  Changing printheads requires an operator with mechanical skills, time and patience to do the job correctly.  With the C7500G, the printheads are permanent and not a consumable item.
In addition to the consumable printheads, the Kiaro printer has other consumable items.  The second negative is the time and money required to change these items.  The Kiaro has a “Blade Cleaner”, “Purge Unit”, and “Maintenance Cartridge” which are considered consumable items.  In addition, the printer has parts that need to be replaced as required such as the “Transport Unit”. To replace many of these items, draining the ink and special tools are required.  The time and money required to change these items seems onerous to me.  The C7500G has a “Maintenance Kit” that takes seconds to change and costs $30.  I tell customers that they’ll need approximately 3 of these kits per year with heavy use.   
Lastly, the Kiaro printer seems to require must more work and maintenance to keep these printers operating.  By the accounts of formers users now customers, the Kiaro printers have issues with streaks and require lots of repair.  Although having C7500G printers that required repair, we’ve found these printers durable and reliable.  Plus they are much easier to operate.  For most customers, operators of the C7500G must just press “Print”.
Although the Kiaro can print great looking images, and produce very small and short labels, the requirements to keep these printers operating appear to be very difficult for most users.  In this regard, the C7500G is much easier to use and reliable while producing great looking labels.

As for another comparison, check out a previous post, the LX2000 vs the C7500, here:  http://colorlabelsondemand.blogspot.com/2017/09/lx2000-vs-c7500.html

Another point to consider: the Kiaro printer comes in an 8” version as well.  However, the 8” version is two 4” printheads stitched together.  Not only does this printer have 8 printheads to replace, but also has had issues with the stitching between the heads.  Because of this issue, I believe Quick Label Systems launched their Memjet printer, the QL-800 and purchased Trojan line of printers.

I hope this comparison helps with your analysis of the available printers for on-demand color labels. Contact us if we can help with your color label printer requirements.
Guy Mikel
855-962-7670
Kiaro vs C7500G

The Kiaro from Quick Label Systems, https://www.quicklabel.com/products/color-label-printers/commercial-label-printing/kiaro/,  has been one of the largest selling color label printers on the market.  Astro Nova has done a good job selling this printer.

Kiaro Label Printer
Kiaro Label Printer


I know this printer mostly from my work with current customers that have switched away from the Kiaro.  This week, I spoke with another prospect who had decided to purchase a C7500G.  Based on this discussion, I decided to try to describe the important differences between the Kiaro (and the other options sold under different names) and the C7500G. 

Before starting, please know that the Kiaro is the exact same printer as the Swiftcolor SCL 4000 D/P sold by Kanematsu. https://www.swiftcolor.com/SCL-4000DP.php

SwiftColor 4000
SwiftColor 4000

Many years ago I wrote about the Swiftcolor printer in this post:  http://colorlabelsondemand.blogspot.com/2013/08/short-run-in-plant-batch-label-printing.html 

Kanematsu sells the printer to AstroNova/Quick Label Systems under an OEM agreement.  Up until recently, Kanematsu was the distributor for Canon outside of Japan for this label printer.  In January, 2018 at CES, Canon announced the launch of these printers, the D5500, in North America:   https://downloads.canon.com/nw/printer/products/printers-and-multifunction/card-label-printers/ij-label-printers/lx-d5500/specifications/lx-d5500_specification_sheet.pdf

Canon Label Printer
Canon Label Printer
Now you have access to purchase the same printer from three different companies. In this post, I’ll use the brand name, Kiaro to represent all of the options.  And Please Remember; we don’t sell the Kiaro printer.  I decided not to sell the Swiftcolor line of printers after attending a maintenance class.  But more about care and maintenance of these color label printers later.
Looking at the Kiaro, I see 4 unique benefits vs the C7500G. First, the Kiaro offers up to 1200 x 1200 dpi print resolution; much higher than the C7500G with 1,200 x 600 resolution. I’ve seen great print quality from the Kiaro printer.
Second, the Kiaro comes in either dye or pigment-based inks.  Die ink are much more vibrant; but are not water resistant or water proof.  The ink will come off labels easily.  Pigment inks are very durable; but are not as vibrant in color as the dye Kiaro models.  But the choice is good to have depending on your requirements.
Kiaro Label Printer with Winders

Third, the minimum width of a 4” version of the Kiaro printer is 25 mm or .984”; which is narrower than the C7500G at 2”.  And the minimum length of a label is 6 mm or .236”; much shorter than the 1” minimum of the C7500G.  Narrow widths and shorter lengths make the Kiaro printer fit many more applications.

Fourth, the Kiaro offers an optional cutter.  For tag application in apparel or greenhouse, this cutter is a unique capability.  At the 2017 WestPack, I saw the Swiftcolor printer with a cutter in action.  Read about the cutter for tags in this post:  http://colorlabelsondemand.blogspot.com/2017/02/westpack-2017.html.  The cutter with the C7500G is not designed to cut each label; rather to cut at the end of a print job.


Although the Kiaro has other features, I don’t see them as unique or valuable in the comparison with the C7500G.
As for the negatives, I see 3 with the Kiaro printer.  The first and largest is the 4 consumable print heads.  As each printhead may cost up to $750, it is expensive to replace this consumable item.  As I understand, the costs are $2500 to replace all 4 print heads at once.
How long one of the four printheads last depends on the material and percentage coverage of the labels printed.  Many years ago, I requested from SwiftColor an inkcost and printhead estimate on this 4 x 3” label:

4
4″ x 3″ Color Label Test Sample
And Kanematsu sent me this estimate:

SwiftColor Yield Estimate


Although my request was concerning ink cost, the printhead life was more interesting to me.  At 161,186 4” x 3 labels, the printhead cost per label was 483,000 inches and added $0.0046/label; almost ½ of a penny per label for just the black printhead.  If you add up the cost of all 4 printhead, the cost per label was $0.013 just for printheads (assuming $750/printhead).  At the time, I was told the black line around the label reduced the black printhead life.  In this example, the printhead cost was almost as much as the ink cost/label. (Remember; these costs were from many years ago.  The printhead price may have changed).

In addition to the cost of the consumable printhead, installation of one of the four printheads is not so easy.  To replace the printhead, you need to drain the ink, disassemble the printer and remove 1 of 4 printheads, reassemble the printer and then recharge the ink.  In this video, Quick Label Systems assumes you want to change all 4 printheads at one time.


However, most people will want to change only the affected printhead.  You’ll need to remove and replace the printhead from the array.  Changing printheads requires an operator with mechanical skills, time and patience to do the job correctly.  With the C7500G, the printheads are permanent and not a consumable item.
In addition to the consumable printheads, the Kiaro printer has other consumable items.  The second negative is the time and money required to change these items.  The Kiaro has a “Blade Cleaner”, “Purge Unit”, and “Maintenance Cartridge” which are considered consumable items.  In addition, the printer has parts that need to be replaced as required such as the “Transport Unit”. To replace many of these items, draining the ink and special tools are required.  The time and money required to change these items seems onerous to me.  The C7500G has a “Maintenance Kit” that takes seconds to change and costs $30.  I tell customers that they’ll need approximately 3 of these kits per year with heavy use.   
Lastly, the Kiaro printer seems to require must more work and maintenance to keep these printers operating.  By the accounts of formers users now customers, the Kiaro printers have issues with streaks and require lots of repair.  Although having C7500G printers that required repair, we’ve found these printers durable and reliable.  Plus they are much easier to operate.  For most customers, operators of the C7500G must just press “Print”.
Although the Kiaro can print great looking images, and produce very small and short labels, the requirements to keep these printers operating appear to be too difficult for most users.  In this regard, the C7500G is much easier to use and reliable while producing great looking labels.

As for another comparison, check out a previous post, the LX2000 vs the C7500, here:  http://colorlabelsondemand.blogspot.com/2017/09/lx2000-vs-c7500.html

Another point to consider: the Kiaro printer comes in an 8” version as well.  However, the 8” version is two 4” printheads stitched together.  No only does this printer have 8 printheads to replace, but also has had issues with the stitching between the heads.  Because of this issue, I believe Quick Label Systems launched their Memjet printer, the QL-800 and purchased Trojan line of printers.

I hope this comparison helps with your analysis of the available printers for on-demand color labels. Contact us if we can help with your color label printer requirements.
Guy Mikel
855-962-7670
NS Multi Print Quality

This week, we reinstalled our NS Multi Demo printer after showing it for the first time at WestPack in February.

NS Multi Corrugated Printer Setup
NS Multi Corrugated Printer Setup With Grant Lapke

You can read about our experience at WestPack here:  http://colorlabelsondemand.blogspot.com/2018/02/westpack-2018-launch.html

It was a great experience for us to set up this printer again.  Most importantly, the experience reconfirmed the outstanding print quality that the NS Multi delivers.  Watch us print inkjet coated boxes here:


According to Grant Lapke, lead on the NS Multi for Color Label Solutions, “the black in this artwork printed outstanding compared to other options.  For me, black is always the most difficult color. The NS Multi Print is really durable, great for printing many different short run boxes.”
Just as important for me, we saw outstanding print quality from bright white, non-inkjet coated boxes.  Look at the print quality of this box:

NS Multi Print Quality

Look at the individual feathers in the parrot.  And the ink cost was less than $0.10.
And we test printed a “Panel” on white, non-inkjet coated, corrugated sheets.  Look at the print quality of this print output:

NS Multi Print Quality

This one approximately 18” x 14” panel cost approximately $0.025 to print.  Only $0.10 for 4 panels on a box.  Our ink cost is great!!
Our next steps are to set up our corrugated, inkjet coating process and install our box die cutting operation.  We hope to have these operations running shortly; so we can begin producing unique blank boxes for you.
If we can print samples for you, please contact us.  We’d love to show you how great the NS Multi prints.
Guy Mikel
855-962-7670
info@colorlabelsolutions.com

5 Ways To Save On Labels

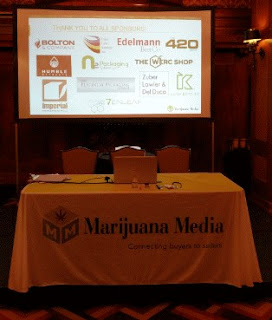
This week, I presented “5 Ways To Save On Labels” at Marijuana Media’s, “Packaging, Labeling, and Tips on How To Save Money” seminar in LA:

5 Ways To Save On Labels


http://marijuanamedia.com/marijuana-packaging-labeling-revolution-ahead-ca/

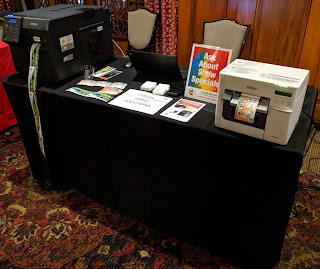
And I had a table with printers and label samples:

Color Label Solutions at Marijuana Media
Guy Mikel Presenting

In addition to myself speaking on labels, Joel Bessmer, who led the event had presenters covering Regulatory, Packaging and Legal aspects of labels for cannabis providers in California.  If you are interested in the presentations, you can get them here:

http://marijuanamedia.com/marijuana-packaging-labeling-revolution-ahead-ca/

As you all purchase and use labels, I encourage you to review my presentation.  You may find an idea that would save you money on your purchase of labels; including from us. To see the presentation, go to SlideShare:

https://www.slideshare.net/GuyMikel1/5-ways-to-save-on-labels

To summarize my presentation, the topics I covered were as follows:

  1. Preprint vs On-Demand: Depends on the number of SKU’s
  2. Variable Data Usage:  Depends on the number of SKU’s on how to approach
  3. Size Selection: Standard Sizes vs Custom Sizes depends on order quantity
  4. Order Quantity: Small Initial Orders vs Annual Orders
  5. Durability Requirement: Paper vs Synthetic
In addition, I provided two bonus ways to save on labels:

  • Manual vs Semi-Automatic vs Automatic application (watch the video on label applications on tubes)
  • Trusted Reseller (like us!)
But please go through the presentation and contact us if you have questions on any of the topics.  Or contact us if you want to save money on your labels.

Guy Mikel
855-962-7670
5 Ways To Save On Labels

This week, I presented “5 Ways To Save On Labels” at Marijuana Media’s, “Packaging, Labeling, and Tips on How To Save Money” seminar in LA:

5 Ways To Save On Labels


http://marijuanamedia.com/marijuana-packaging-labeling-revolution-ahead-ca/

And I had a table with printers and label samples:

Color Label Solutions at Marijuana Media

(Sorry, no pictures of me actually presenting)

In addition to myself speaking on labels, Joel Bessmer, who led the event had presenters covering Regulatory, Packaging and Legal aspects of labels for cannabis providers in California.  If you are interested in the presentations, you can get them here:

http://marijuanamedia.com/marijuana-packaging-labeling-revolution-ahead-ca/

As you all purchase and use labels, I encourage you to review my presentation.  You may find an idea that would save you money on your purchase of labels; including from us. To see the presentation, go to SlideShare:

https://www.slideshare.net/GuyMikel1/5-ways-to-save-on-labels

To summarize my presentation, the topics I covered were as follows:

  1. Preprint vs On-Demand: Depends on the number of SKU’s
  2. Variable Data Usage:  Depends on the number of SKU’s on how to approach
  3. Size Selection: Standard Sizes vs Custom Sizes depends on order quantity
  4. Order Quantity: Small Initial Orders vs Annual Orders
  5. Durability Requirement: Paper vs Synthetic
In addition, I provided two bonus ways to save on labels:

  • Manual vs Semi-Automatic vs Automatic application (watch the video on label applications on tubes)
  • Trusted Reseller (like us!)
But please go through the presentation and contact us if you have questions on any of the topics.  Or contact us if you want to save money on your labels.

Guy Mikel
855-962-7670
WestPack 2018 Launch

At WestPack 2018 in Anaheim, CA, we launched the NS Multi, the on-demand color box printer from New Solutions in Portugal. www.printboxesondemand.com 

Color Label Solutions and the NS Multi at WestPack 2018

Although we spoke to many people about label printing, most of our time was spent with people interested in printing boxes in color, and on-demand.  From this experience, I have 3 key observations that I would like to share with you.

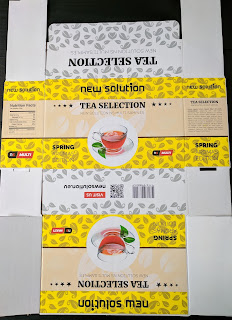
NS Multi Printed Box

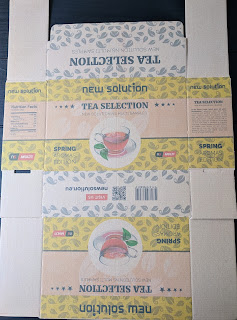
First the NS Multi produces beautiful print quality.  In the picture above, we printed on a pre-cut box with a white face and coated with an inkjet receptive coating.  The print quality, which is up to 1600 x 1600 DPI is fantastic when using the inkjet coating.  Here is the print on our locally coated off-white box:


Inkjet Coated Box Printed by the NS Multi
In this print, you can see the individual feathers on the birds.  And no pixelated dots in our Color Label Solutions logo.  On the inkjet coating, the print quality is great.
Even on Kraft boxes, the print quality is very good; and probably good enough for many applications.
NS Multi Printed Kraft Box
But the same artwork on the white, inkjet coated side looked very nice.


At WestPack, we made a stack/pillar of printed boxes on top of the NS Multi:

NS Multi Printed Box Stack
Second, the NS Multi will help many companies manage their inventory of empty boxes.  I spoke with several companies who had lots of SKU’s; and needed a different approach to box inventory management.  One company told me that they had 550 SKU’s with many hundreds of different boxes.  With so many SKU’s, this company had to purchase a large quantity of each box, and keep stacks and stacks of boxes in their warehouse.  

Plus, they had to pick the boxes they require every day from their inventory.  And the company has problems with obsolete inventory of boxes as their artwork and products constantly change.  By using the NS Multi, this company can eliminate obsolete inventory and can reduce their inventory of boxes to as low as 4 to 5.

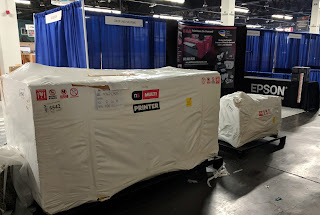
NS Multi On Pallet Arriving at WestPack
Third, I was surprised by the number of people who wanted/needed some number of boxes printed.  These companies need a very short run of boxes; printed with their individual artwork.  Some of these people had very small companies, but still wanted good looking boxes in small quantities.  And some of these companies needed an initial short run for testing of new products.  It’s clear that a lot of opportunity exists for short run box production.
Overall, the NS Multi produces beautiful print output; and is perfect for companies with lots of SKU’s or companies who want to print boxes in short runs for their customers.  Two great targets for this new device.
To learn more about the NS Multi, read my previous post on this printer:


Or my post on Label Expo Europe where I first saw the printer:


For $99,900, you get the NS Multi printer, the Caldera RIP software (https://www.caldera.com),  10 liters of ink, 5 printheads, 1 year of on-site service and installation/training support.  Everything you need to start printing your own boxes.  And you can purchase additional years of extended on-site warranty for $7900 for the 2nd year; and $15,000 for years 2 and 3.
WestPack was not only good for us at Color Label Solutions because of the launch of the Multi, but also everyone who attended the show wore our 10 Pt gloss paper badge:

WestPack 10 Pt Gloss Paper Badge
Doesn’t it look great!  I’m excited the badges turned out so well.
If you have a lot of SKU’s and are in need of a box solution, or want to print boxes in color and on-demand for your customers, contact us to discuss how the NS Multi will meet your requirements.  After seeing how well their printer works, I’m convinced the NS Multi is a great fit for companies like yours.
Guy Mikel
855-962-7670
Introducing-The NS Multi

February 6th, 2018 will be a big day for Color Label Solutions; as we launch a new line of printers.  Not for labels; rather we’ll launch a printer for boxes.


Introducing the NS Multi


At WestPack, 2018,  in booth #5542, we’ll launch the New Solutions Multi (NS Multi) box printer.  With this printer, you’ll be able to print any paper-based package up to ½” thick and 43” wide.
To prepare for our launch, I spoke with Stewart Bell, Vice President of Sales for New Solution, about the NS Multi.  When asked, was is the most important aspect, Stewart said, “The NS Multi is enabling technology.  The printer allows companies to print short-run, on-demand packaging easily and affordably on pre-cut cartons, corrugated sheets, or folded carton stock.  The NS Multi prints on paper-based packaging that will adsorb the ink.”
Stewart continues, “The NS Multi is perfect for any company with a large number of SKU’s that wants to print (from 1 to 300) pieces at a time.  Or companies that want to add variable data to their cartons, making each unique.  Probably most importantly, box manufacturers can now print short-runs of boxes for their customers quickly without worrying about plates or press time.” 

NS Multi Key Benefits
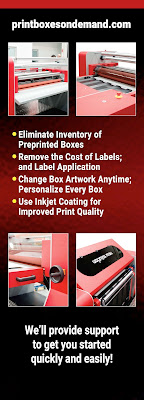
From my perspective, I see 4 key benefits from using the NS Multi.  First, you can eliminate the inventory of preprinted boxes. Now you can print the boxes you need, when you need them.  You will not be required to purchase a large run of preprinted boxes.
Second, you can change box artwork at any time; personalizing every box if desired.  It’s enables companies to “Brand On-Demand” quickly adapting their product messaging based on their target customers and/or distribution.
Third, you can eliminate the cost of labels and label application by printing directly onto your packaging.  Large labels can get expensive.  Label application by hand may lead to placement issues and takes a lot of labor. Label applicators cost a lot of money and can be a difficult process to implement.  By printing directly onto your package, you can replace many labels in your operation.
Fourth, the New Solution Company offers inkjet coating to apply to paper-based packaging.  This coating enables the NS Multi to produce beautiful, finished goods packaging by holding the ink within the coating giving it a durable high quality finish.  We’ll be showing this at WestPack.

Watch the NS Multi print boxes here:


Need custom printed sheets as a part of your packaging?  Check out what these guys are doing:


Or look how great these packages look.  Beautiful using the inkjet coating.


Or read about when I first learned about the NS Multi at Label Expo Europe: 


As how the NS Multi compares to other box printers, Stewart says, “The NS Multi is competitively priced both for hardware and ink.  Along with the availability of the coating and a professional RIP, we offer a total solution that will empower companies to produce high quality packaging at the point of demand.”
The NS Multi costs $99,900 FOB Works Portugal; and includes 1 year of on-site service. the Caldera RIP, 10 liters ink and 5 printheads. In addition, you can purchase extended on-site warranty for year 2 for $7,900; or for years 2 and 3 for $15,000.   As for ink cost, this large image costs about $0.12 for the ink.  Label and ink costs for an image this large would be much higher.

Beautiful Multi Print Output
Come and see the NS Multi at WestPack February 6 to 8.  To get a free pass to this tradeshow, use this link: 


Let us know if you are coming to this show.  I look forward to showing you the new NS Multi and our other printers at the WestPack trade show.
Guy Mikel
855-962-7670

Introducing-The NS Multi

February 6th, 2018 will be a big day for Color Label Solutions; as we launch a new line of printers.  Not for labels; rather we’ll launch a printer for boxes.


Introducing the NS Multi


At WestPack, 2018,  in booth #5542, we’ll launch the New Solutions Multi (NS Multi) box printer.  With this printer, you’ll be able to print any paper-based package up to ½” thick and 43” wide.
To prepare for our launch, I spoke with Stewart Bell, Vice President of Sales for New Solution, about the NS Multi.  When asked, was is the most important aspect, Stewart said, “The NS Multi is enabling technology.  The printer allows companies to print short-run, on-demand packaging easily and affordably on pre-cut cartons, corrugated sheets, or folded carton stock.  The NS Multi prints on paper-based packaging that will adsorb the ink.”
Stewart continues, “The NS Multi is perfect for any company with a large number of SKU’s that wants to print (from 1 to 300) pieces at a time.  Or companies that want to add variable data to their cartons, making each unique.  Probably most importantly, box manufacturers can now print short-runs of boxes for their customers quickly without worrying about plates or press time.” 

NS Multi Key Benefits
From my perspective, I see 4 key benefits from using the NS Multi.  First, you can eliminate the inventory of preprinted boxes. Now you can print the boxes you need, when you need them.  You will not be required to purchase a large run of preprinted boxes.
Second, you can change box artwork at any time; personalizing every box if desired.  It’s enables companies to “Brand On-Demand” quickly adapting their product messaging based on their target customers and/or distribution.
Third, you can eliminate the cost of labels and label application by printing directly onto your packaging.  Large labels can get expensive.  Label application by hand may lead to placement issues and takes a lot of labor. Label applicators cost a lot of money and can be a difficult process to implement.  By printing directly onto your package, you can replace many labels in your operation.
Fourth, the New Solution Company offers inkjet coating to apply to paper-based packaging.  This coating enables the NS Multi to produce beautiful, finished goods packaging by holding the ink within the coating giving it a durable high quality finish.  We’ll be showing this at WestPack.

Watch the NS Multi print boxes here:


Need custom printed sheets as a part of your packaging?  Check out what these guys are doing:


Or look how great these packages look.  Beautiful using the inkjet coating.


Or read about when I first learned about the NS Multi at Label Expo Europe: 


As how the NS Multi compares to other box printers, Stewart says, “The NS Multi is competitively priced both for hardware and ink.  Along with the availability of the coating and a professional RIP, we offer a total solution that will empower companies to produce high quality packaging at the point of demand.”
The NS Multi costs $89,900 FOB Works Portugal; and includes 1 year of on-site service. In addition, you can purchase extended on-site warranty for year 2 for $7,900; or for years 2 and 3 for $15,000.   As for ink cost, this large image costs about $0.12 for the ink.  Label and ink costs for an image this large would be much higher.

Beautiful Multi Print Output
Come and see the NS Multi at WestPack February 6 to 8.  To get a free pass to this tradeshow, use this link: 


Let us know if you are coming to this show.  I look forward to showing you the new NS Multi and our other printers at the WestPack trade show.
Guy Mikel
855-962-7670

CES 2018

This week, I attended the 2018 Consumer Electronic Show  in Las Vegas.  CES is the world’s gathering place for all those who thrive on the business of consumer technologies. With approximately 170,000 attendees and 3,900 exhibitors, CES is the world’s largest tradeshow.


But I did not go to see what Google, Amazon or what others were launching; rather to see print on-demand badge printing in action.

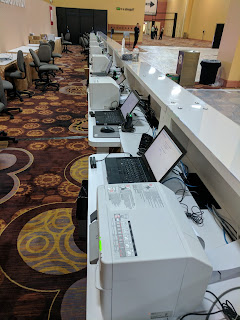
C3500 Badge Printers at CES
CompuSystems, www.compusystems.comprovided the registration solution, including identification badges, for CES.  Founded in 1976, CompuSystems has enjoyed many years as a major registration service provider for the trade show industry. They offer integrated software that meets the specific needs of their clients, creating an ecosystem that fosters the buyer and seller relationship.
If you follow my blog, you may remember this earlier post covering CompuSystems’ move to print on-demand color badges:


During my short visit at the end of the 2nd day, I found the solution that CompuSystems built for CES amazing.  According to Jeremy Kubik, Director of IT for CompuSystems, “we constructed and managed 19 different registration locations in Las Vegas for CES; including not only the main registration tent and the various halls of the convention center, but also in hotels across Las Vegas. We even had three registration areas at the airport.”

CES Main Registration Tent
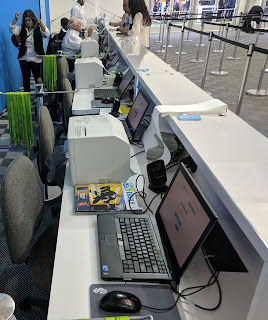
At the various locations, the CompuSystems team setup carts that included a computer, printer and wireless router to connect to the servers running BarTender.  CompuSystems added these locations just prior to the show including the VPN networks to handle all of the data.  Here was the cart running at one of the hotel locations.

Registration Badge Cart at CES
In addition to the network of registration desks, Jeremy and his team used BarTender to create the template and add the variable data to the badges.  The badges included fixed images such as the CES logo and an advertisement on the back panel, but also variable data including a picture which was required for all attendees.  For example, attendees could upload an image prior to the event, use the CES application on their phone, or capture a picture during registration using a small HD web camera:

Camera for Badges
And all of the images were verified instantaneously by an application to confirm the picture was a face.
Also, CompuSystems added a lot of variable data; such as name, company, city and QR code for lead retrieval. In addition, they added color-coded bars for the type of attendee or exhibitor (13 total types).

CES Print On-Demand Color Badges
For the badges, CompuSystems used a 4” x 12” matte poly tag with a crease in the middle to enable front/back printing.  I thought these poly badges printed great; including the images.  For example, the WHOA image, the CES mark for the 2018 show, look great.

WHOA CES 2018
WHOA CES 2018
Or the advertisement on the back panel:

CES Badge Advertisement
After attending CES 2018, I believe Jeremy and the team at CompuSystems deserve an “atta-a-boy” for their work and their on-demand badge solution for the CES show. I can’t imagine the pressure of having hundreds of thousands of people waiting for badges at a trade show; I’m glad the printers and badges worked great.

Guy Mikel at CES 2018
If you want badges for your next tradeshow, pick them up from us here at Color Label Solutions.
Guy Mikel
855-962-7670

Best of 2017

During 2017, we published 31 original (32 if you count this one) posts on 

www.colorlabelsondemand.blogspot.com

which was more than our goal for the year.  As most of you don’t read every post, I’d though you might find a summary of these posts of interest.

Love's Oven Labels
Love’s Oven Labels

As for most read, two stick out.  First, the post that was read the most covered Love Oven’s use of the C7500G.  These guys produce great looking, full-bleed labels. 

http://colorlabelsondemand.blogspot.com/2017/03/edible-love.html.   

Plus, I love how Katie from Love’s Oven built the printing solution herself.  Good work!

L301 label printer Afinia
L301 from Afinia

Second, the next most read post of 2017 was my review of the new L301 color label printer.  This printer produces great looking labels; at the most affordable hardware price of any label printer we sell.  

http://colorlabelsondemand.blogspot.com/2017/02/l301.html.

Color Badge Tag Printers

But the most read does not always represent my favorites.  My favorites are reserved for customers who have built and implemented great label printing solutions.  My two favorites for 2017 have us and BarTender in common.  First, CompuSystems built a great solution using BarTender and the C3500 for printing badges in color and on-demand:  
http://colorlabelsondemand.blogspot.com/2017/06/on-demand-color-badges.html.  

Plus, we worked hard to put together badge options; including matte paper, gloss paper and matte poly tags.  These different tags produce great looking badges.

Quickscrew Label
Quickscrew Label


Second, the Quickscrews used BarTender to pull text, images, color-codes and barcode data from their database to produce labels for 10’s of thousands of SKU’s. As the name of the post states, it’s the perfect example of a print on-demand color label solution.  

http://colorlabelsondemand.blogspot.com/2017/05/perfect-print-on-demand-color-label.html.

LX2000 vs C7500 Ink Cartridge


By far the most controversial post was my analysis of the differences between the C7500 and the LX2000.  As you may know, I add posts to Linked In after publishing.  On Linked In, this post created a lot of comments about the comparison, including one from the VP of Sales from Primera.  What do you think of this analysis? 

http://colorlabelsondemand.blogspot.com/2017/09/lx2000-vs-c7500.html

Guy Mikel at Label Expo Europe

And by far the most difficult post was the report on my visit to Label Expo Europe.  Lots of pictures, video’s and links which make posting a lot more difficult. But I found the Expo very valuable.  See my perspective of the show here: 

http://colorlabelsondemand.blogspot.com/2017/09/label-expo-europe-2017.html

And in this post, you’ll see the new printer we’re launching at WestPack 2018 in Anaheim February 6 to 8.

I enjoy posting my opinions and customer stories covering printing color labels on-demand; It takes work.  But your readership of these posts is the real payoff for this effort.  To date, Google says we have 320,000 page-views from individuals all over the world.  I appreciate your readership; and I hope you find the information in these articles valuable.  May you have a great 2018.
Guy Mikel
855-962-9670